Git: stage, commit, push, pull
This project is a git repository with three commits of its own and a remote - a folder beside the project, made for this lesson, so nothing here leaves your machine. Its working tree holds three changes: hello.ek9 has been edited, shout.ek9 is new and already staged, and notes.txt has never been added. The Git menu and the Git window work on all of this. To play it in the IDE: Help > Lessons > Security, packages and Git…, or ek9 -ide -lesson git-basics.
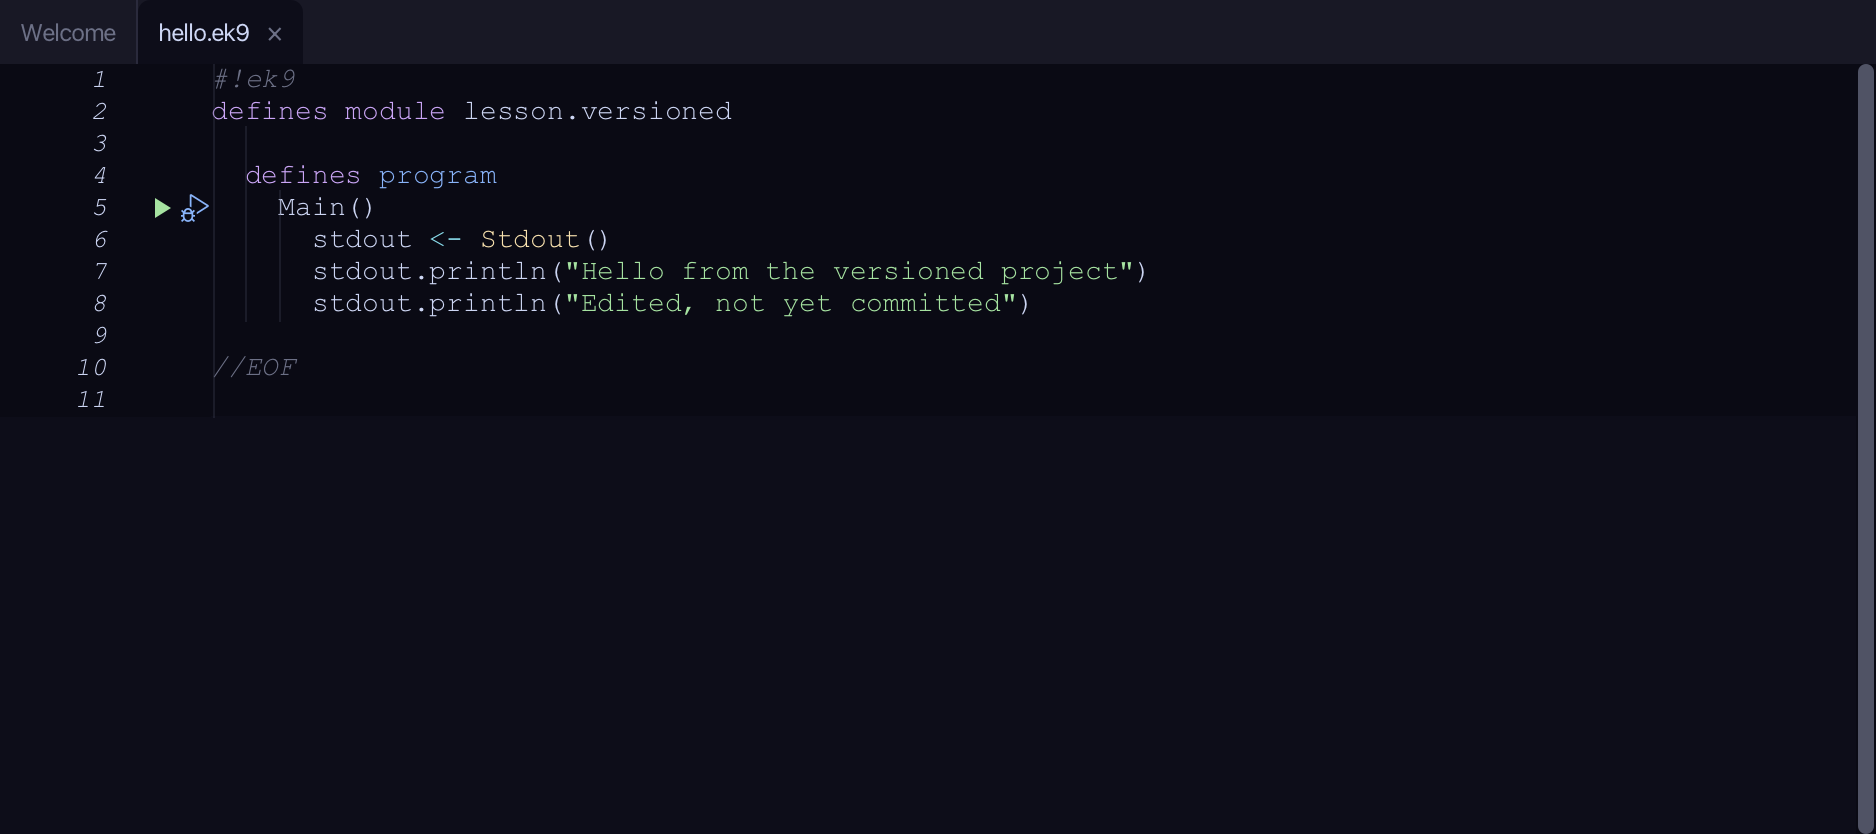
Start from
The code the lesson starts from: copy it into a file of your own and follow the steps.
hello.ek9
#!ek9
defines module lesson.versioned

  defines program
    Main()
      stdout <- Stdout()
      stdout.println("Hello from the versioned project")
      stdout.println("Edited, not yet committed")

//EOF
greeter.ek9
#!ek9
defines module lesson.versioned

  defines function
    greeting()
      -> name as String
      <- result as String: `Hello, ${name}`

    farewell()
      -> name as String
      <- result as String: `Goodbye, ${name}`

//EOF
shout.ek9
#!ek9
defines module lesson.versioned

  defines function
    shout()
      -> message as String
      <- result as String: message.upperCase()

//EOF
notes.txt
Scratch notes - never added to git.
Step 1: The Git window
Choose Git ▸ Commit… (⌘K).
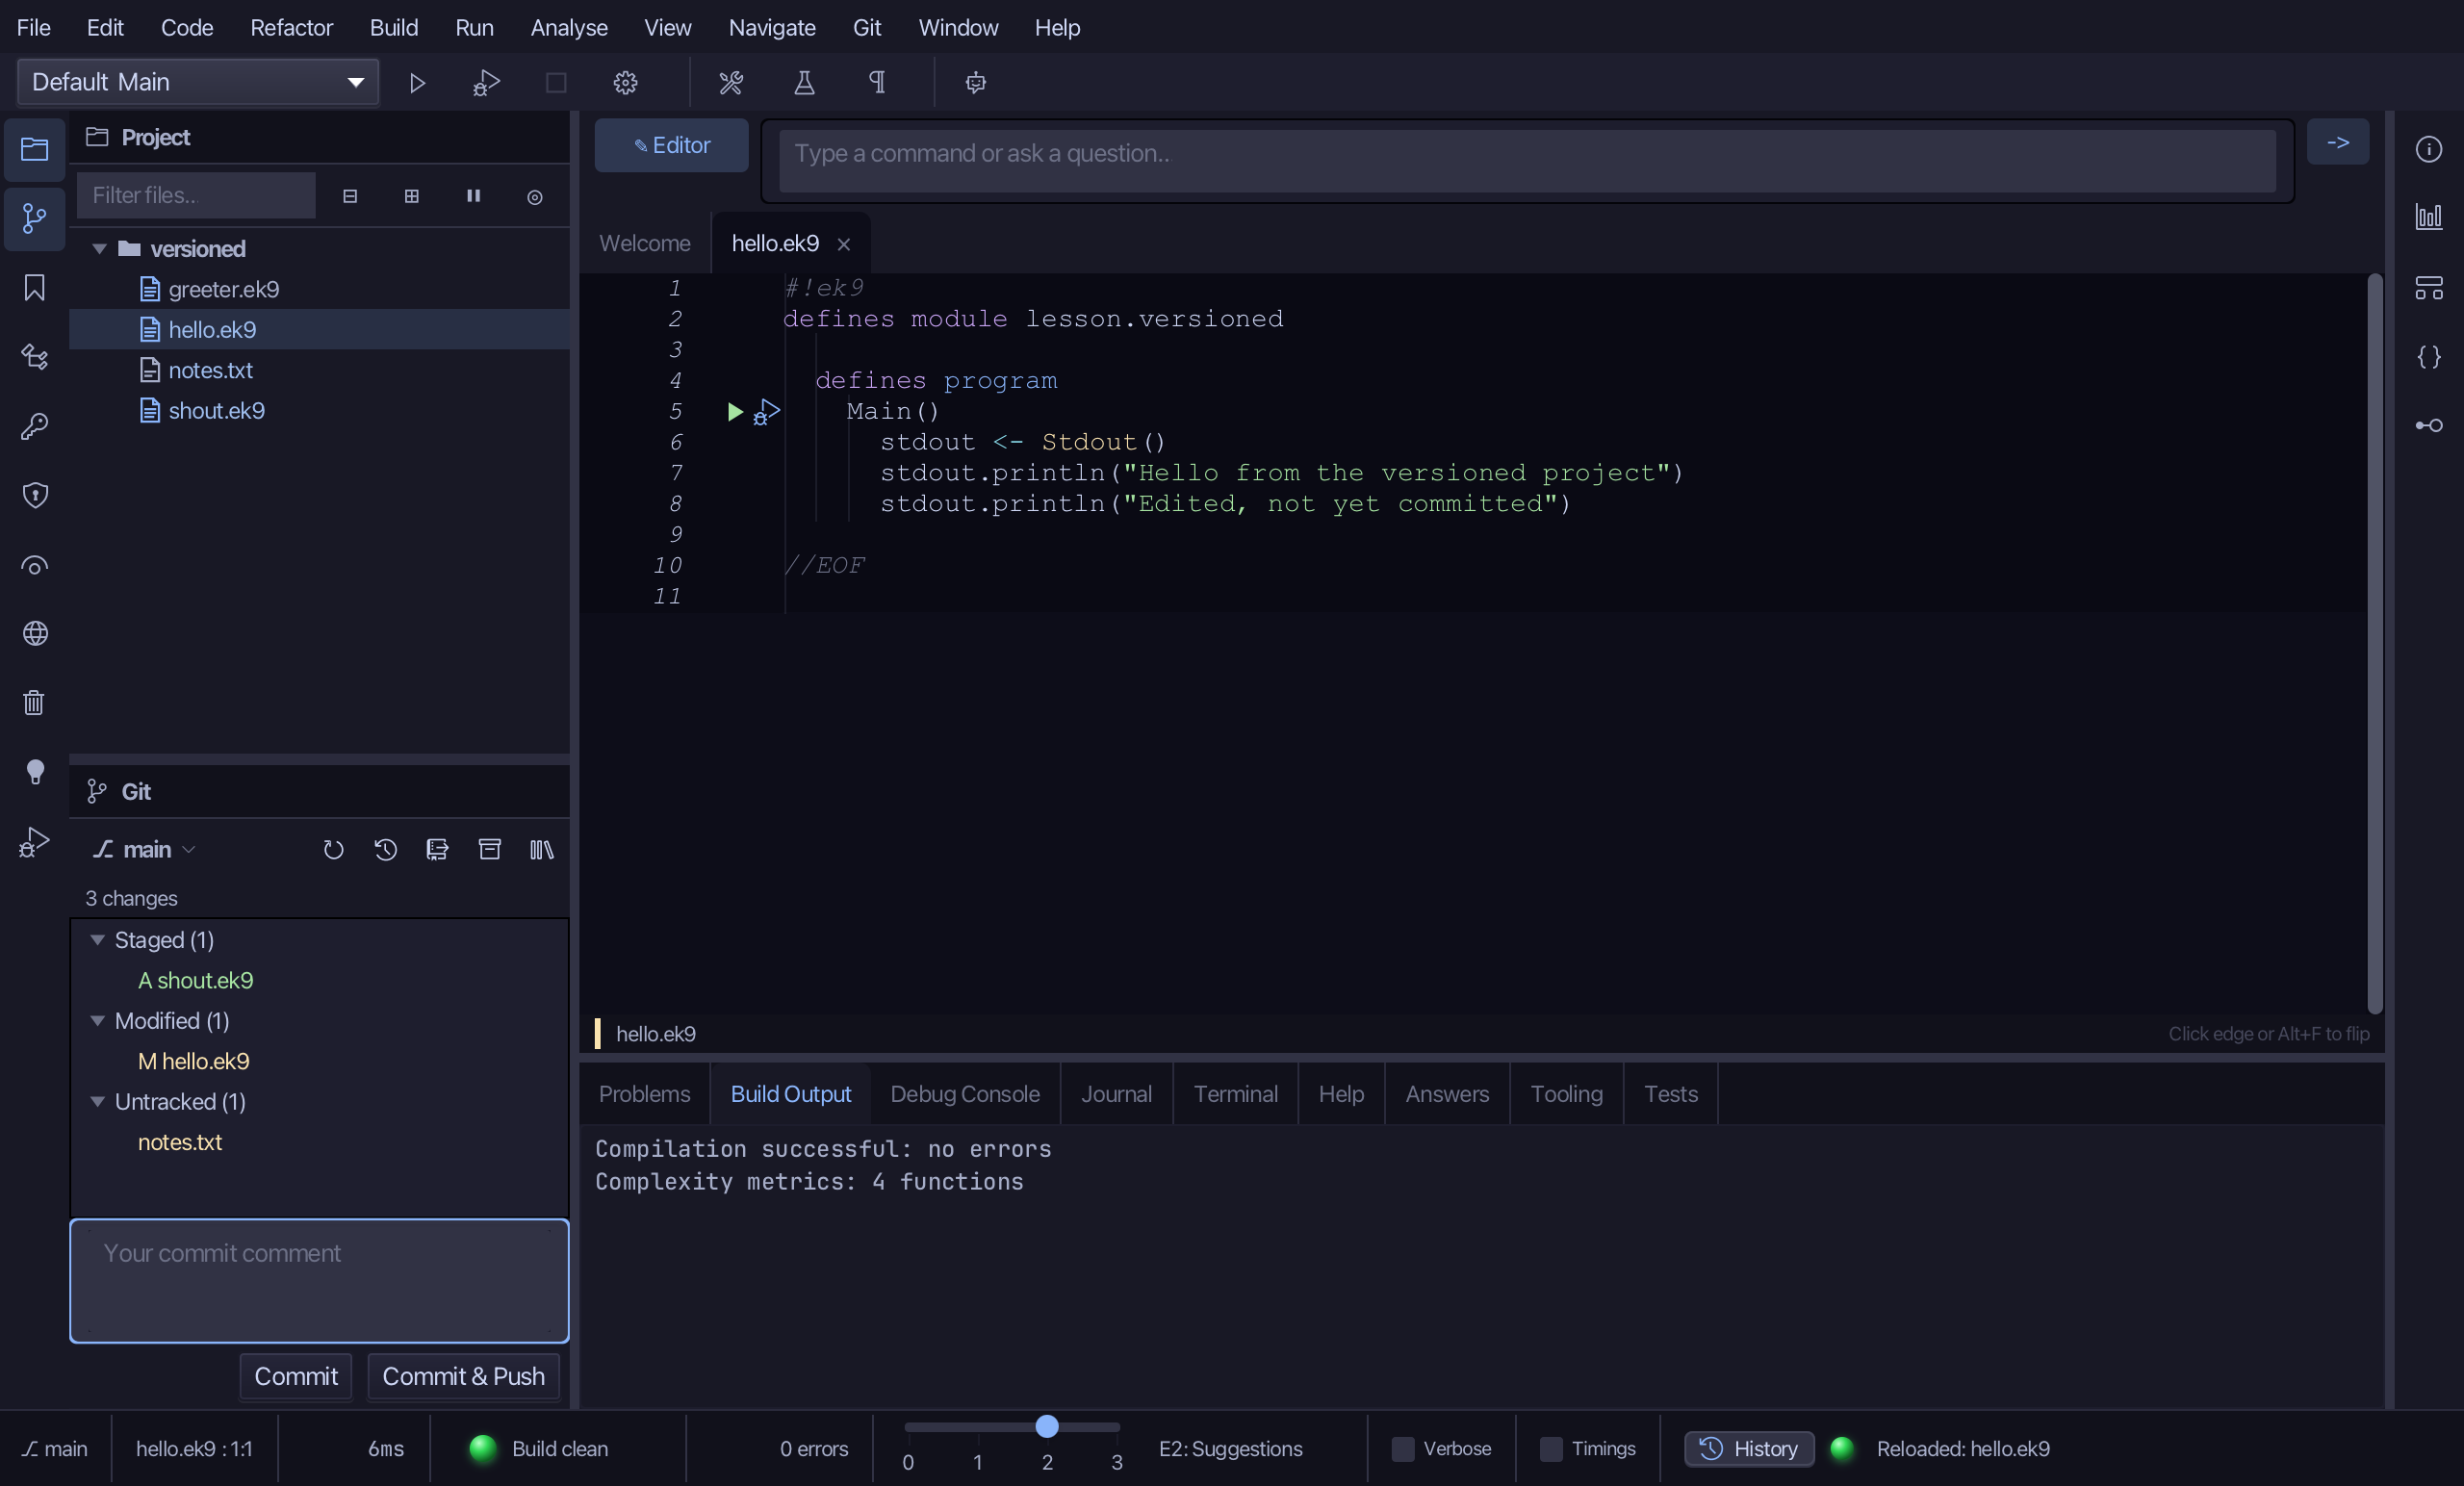
The Git window names the branch at its top - main, with no arrows: in step with the remote - and counts the changes under it, grouped: Staged holds shout.ek9, Modified holds hello.ek9 and Untracked holds notes.txt. The buttons beside the branch are Refresh, Show Git log, Pull, Stash changes… and Show stashes. Below the changes is the box for a commit comment, and the Commit and Commit & Push buttons wait there.
Step 2: Stage and commit
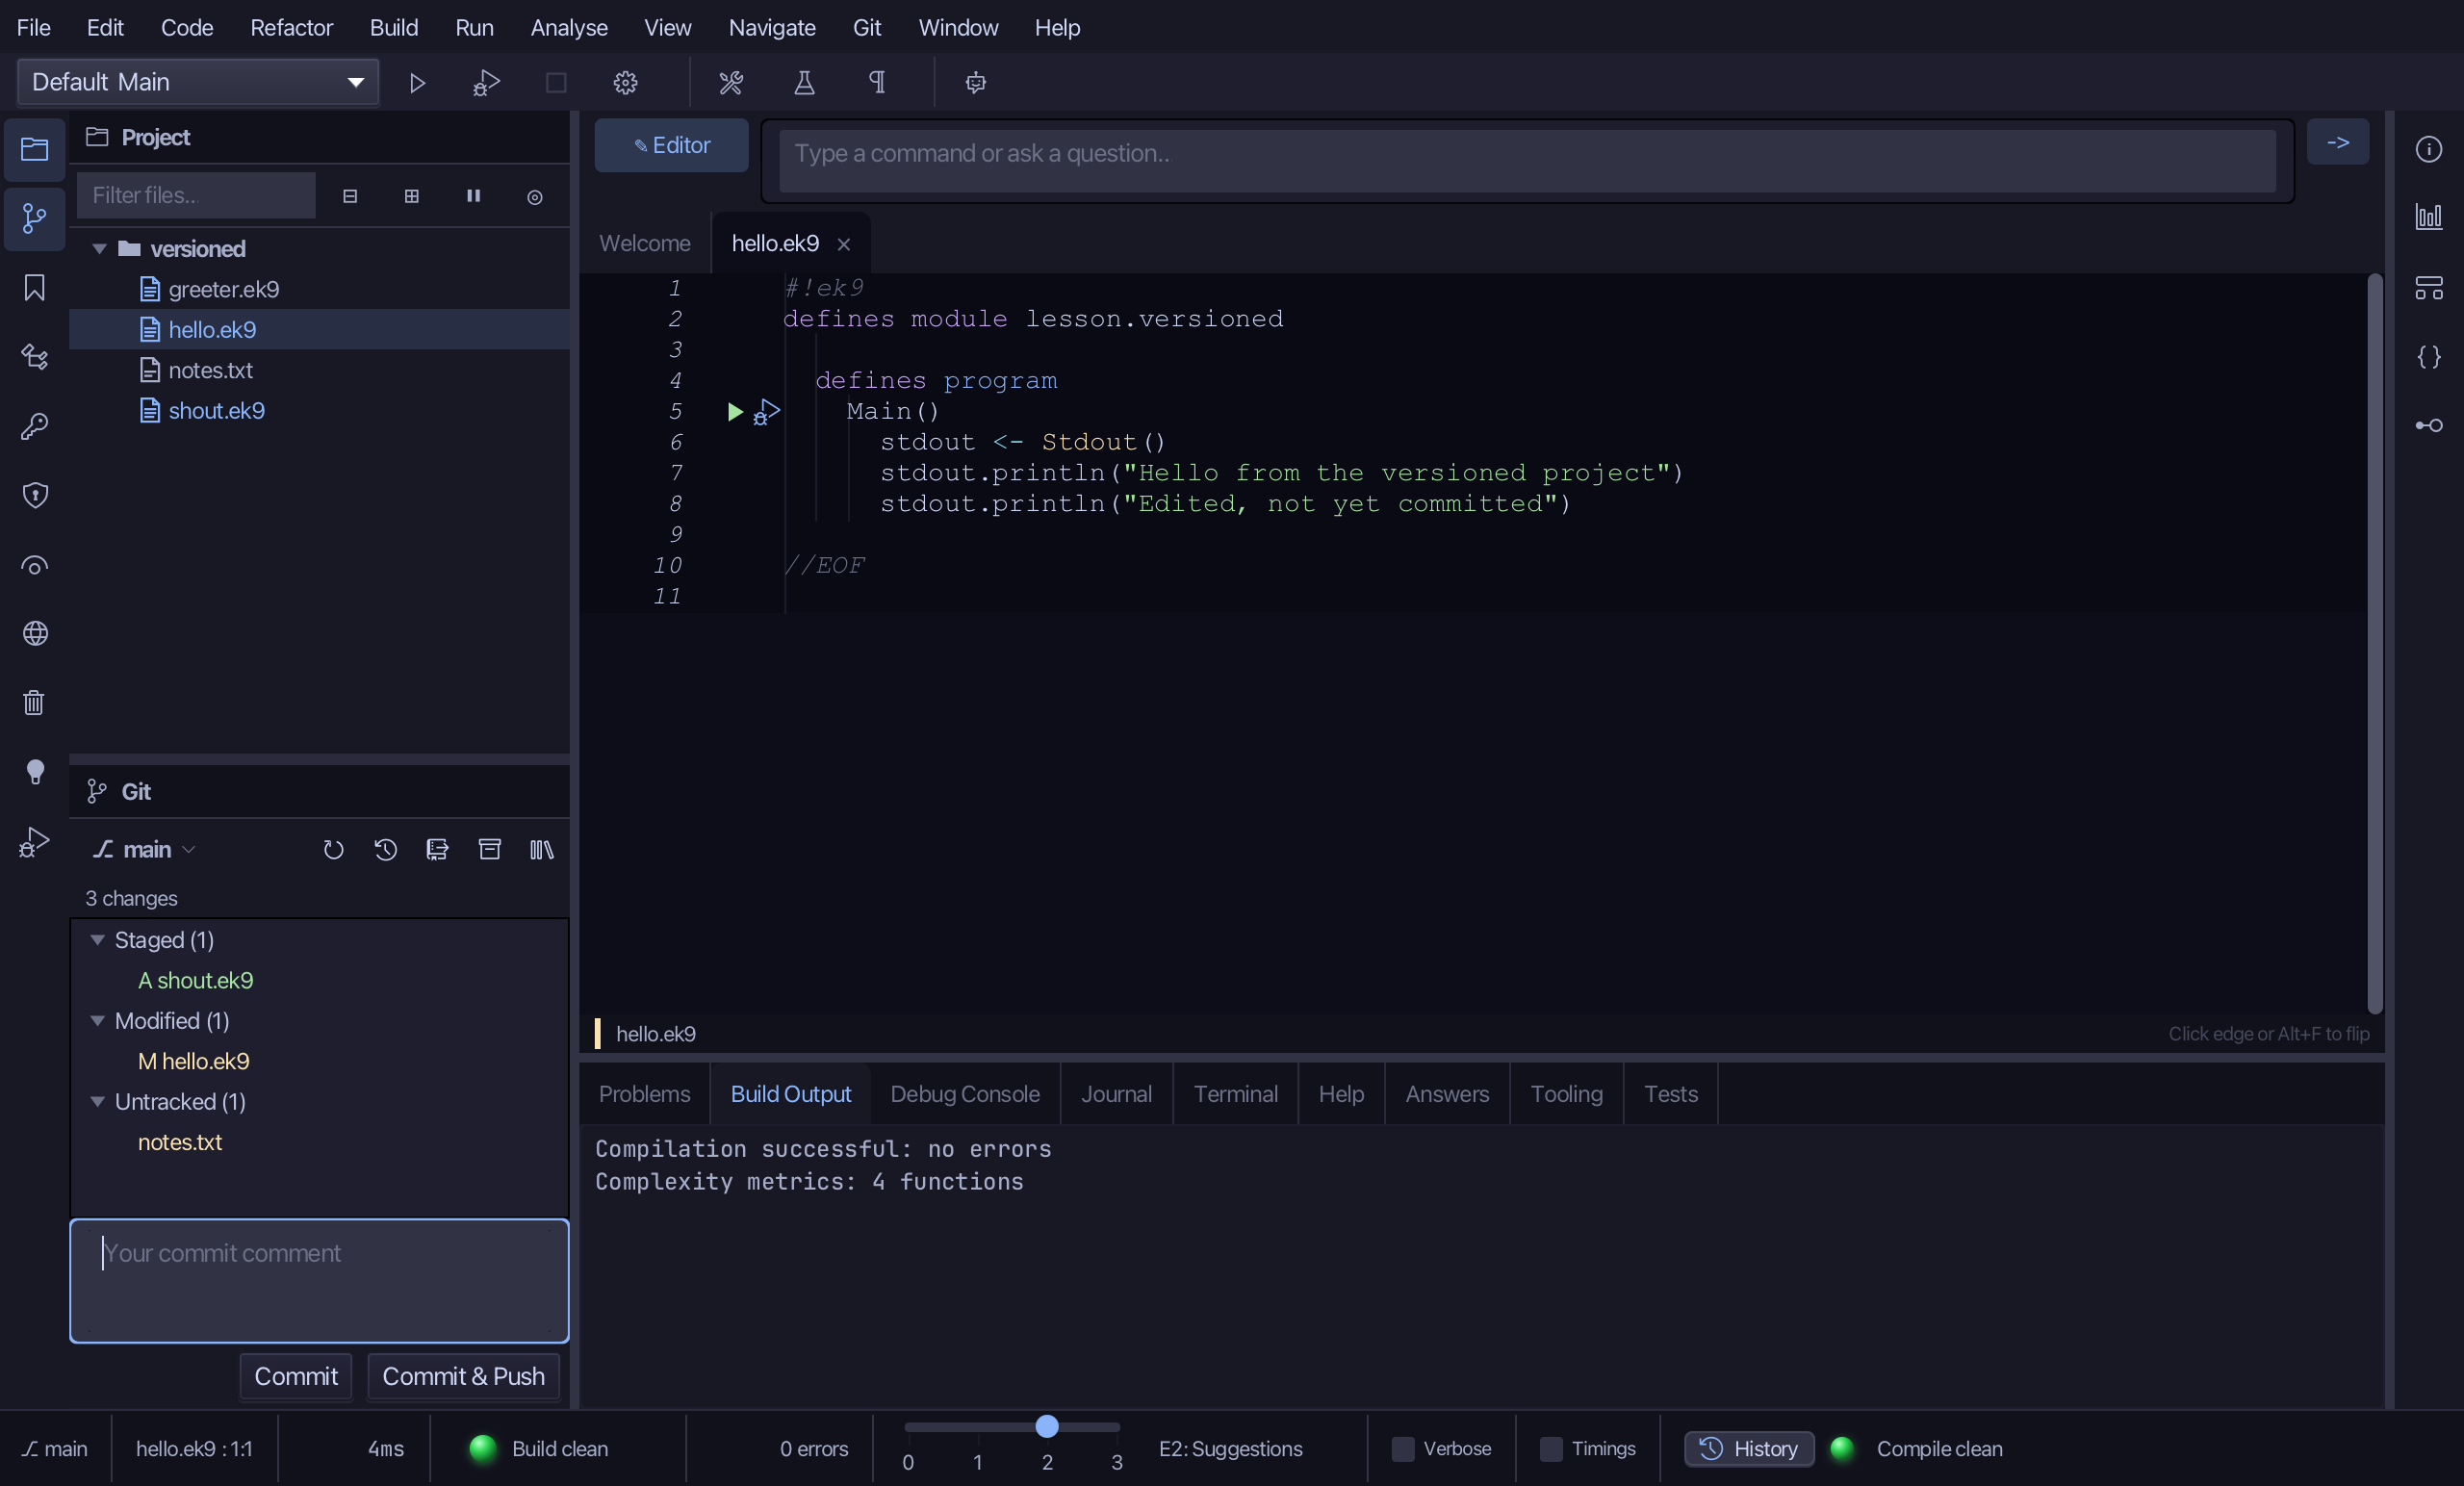
Right-click hello.ek9 under Modified and choose Stage.
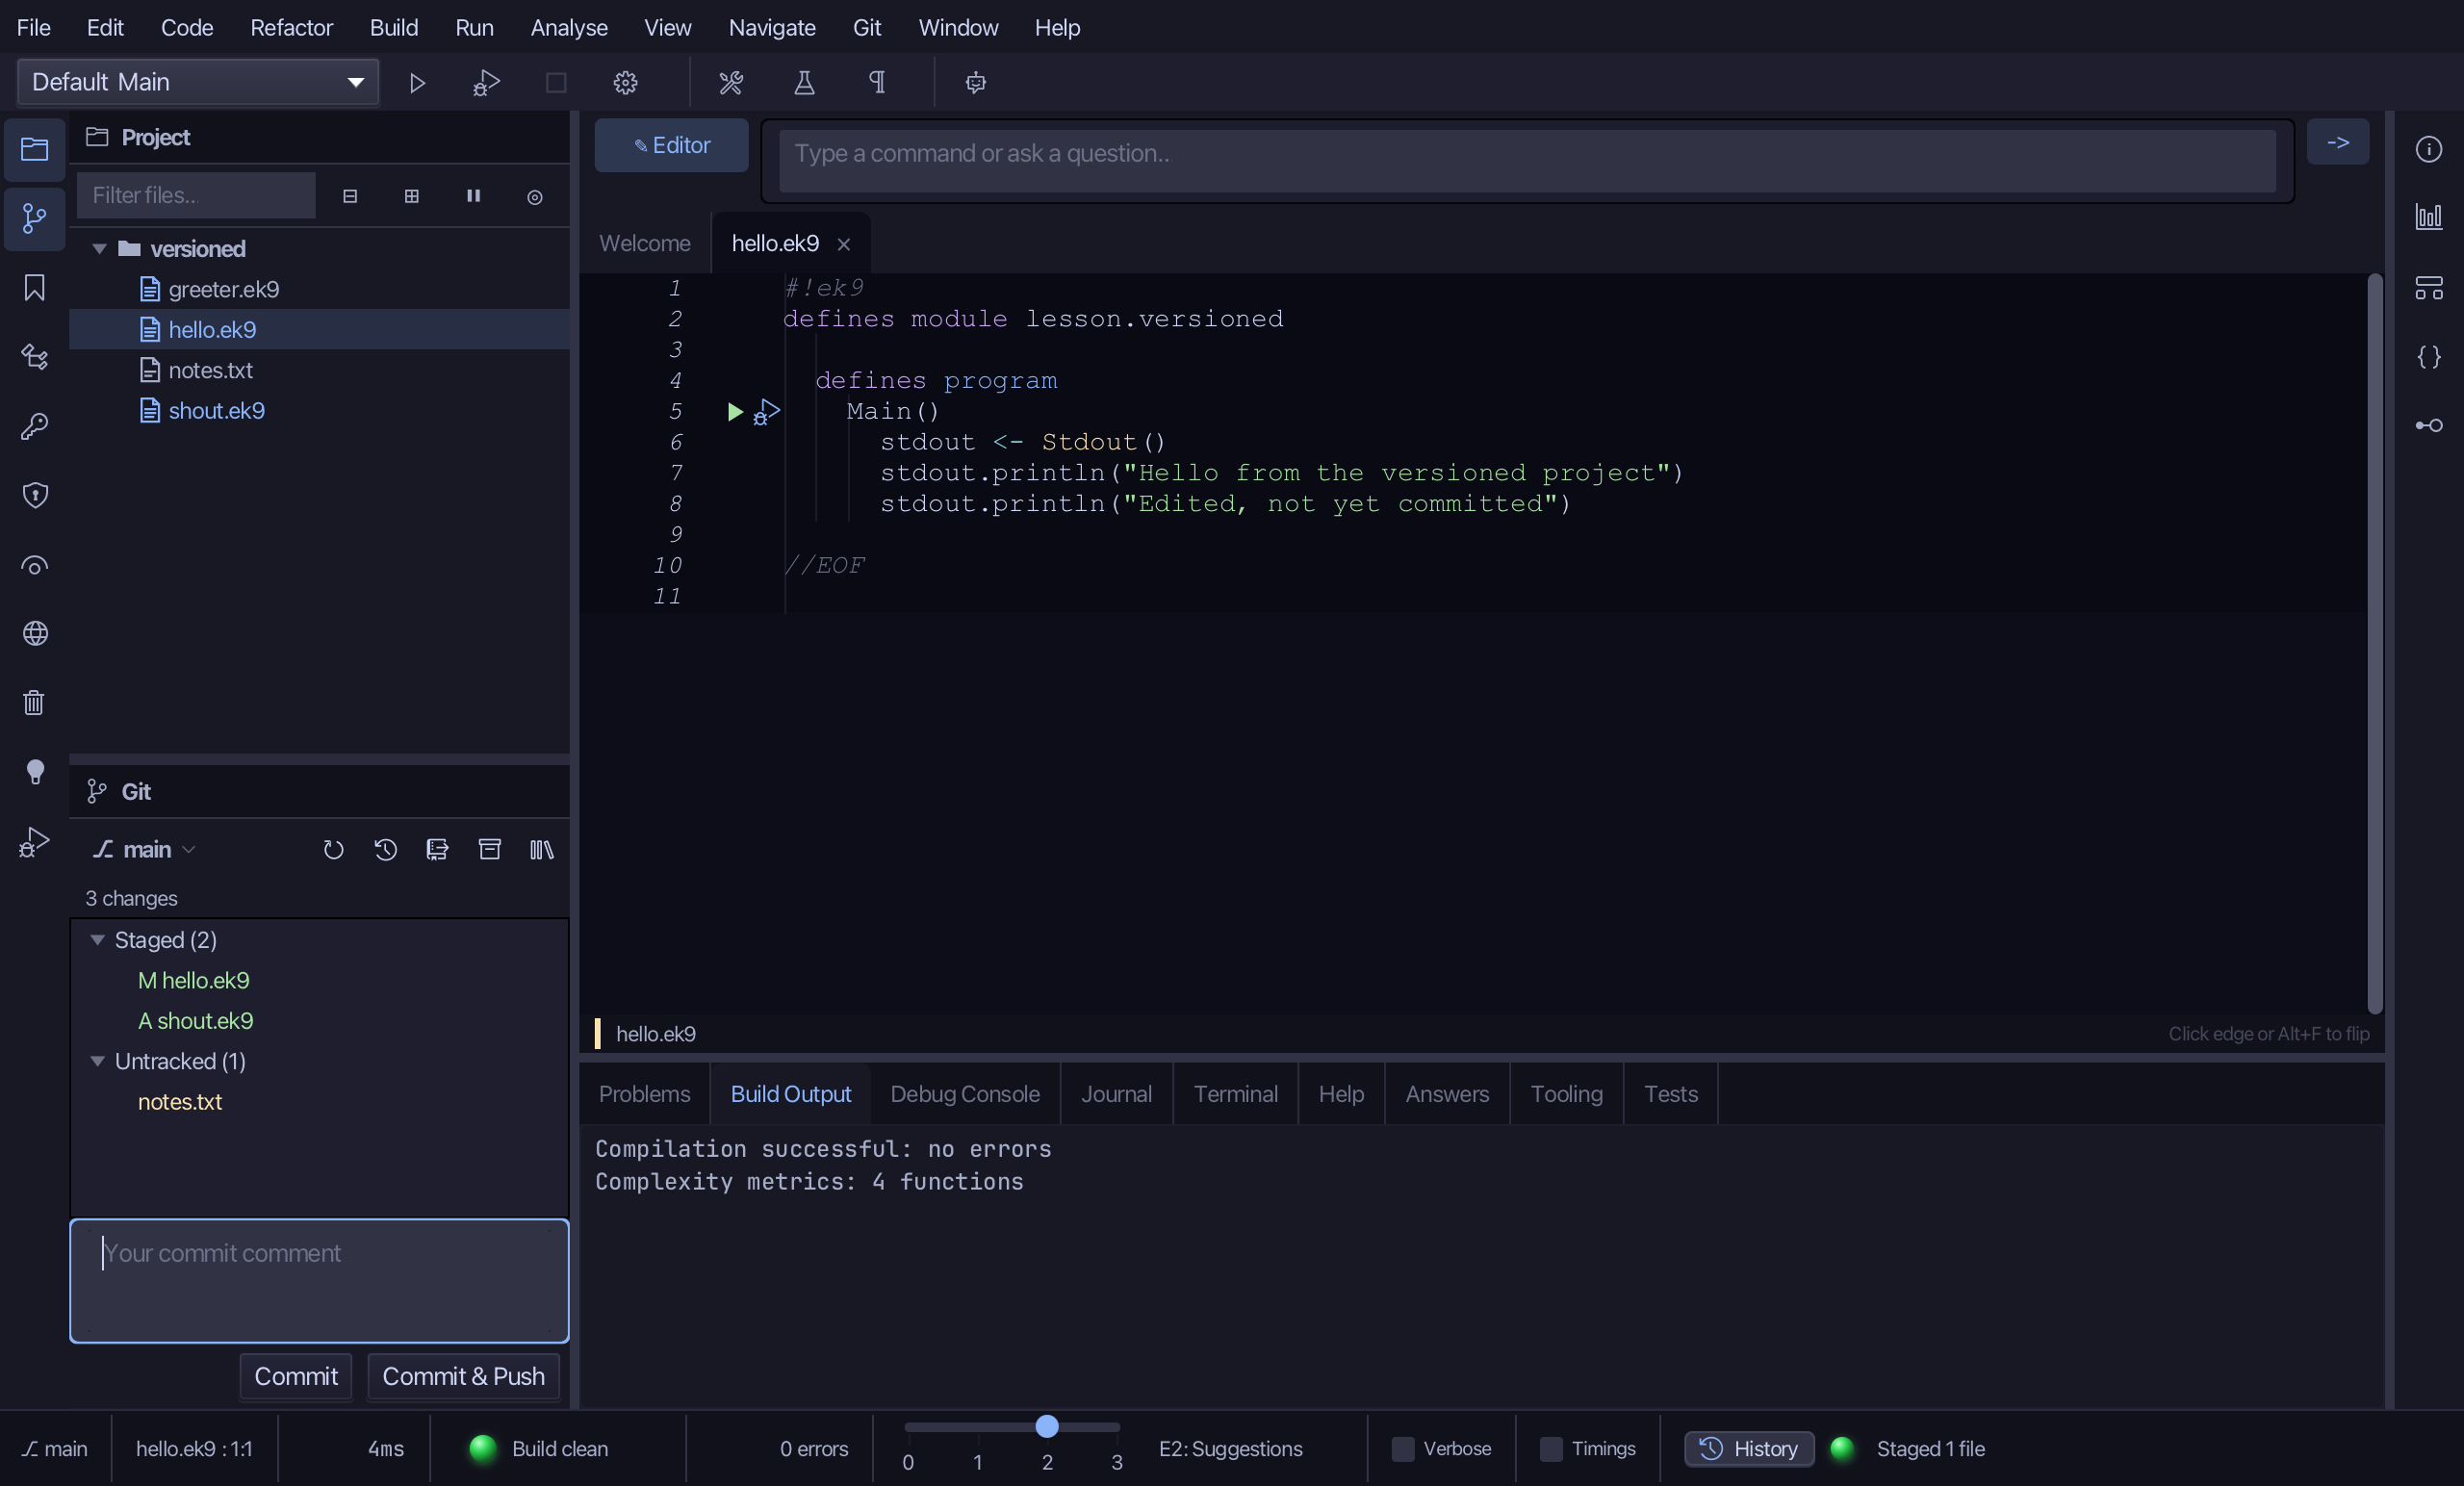
Right-click notes.txt under Untracked and choose Stage - git has never seen it, so staging is also how a new file is added.
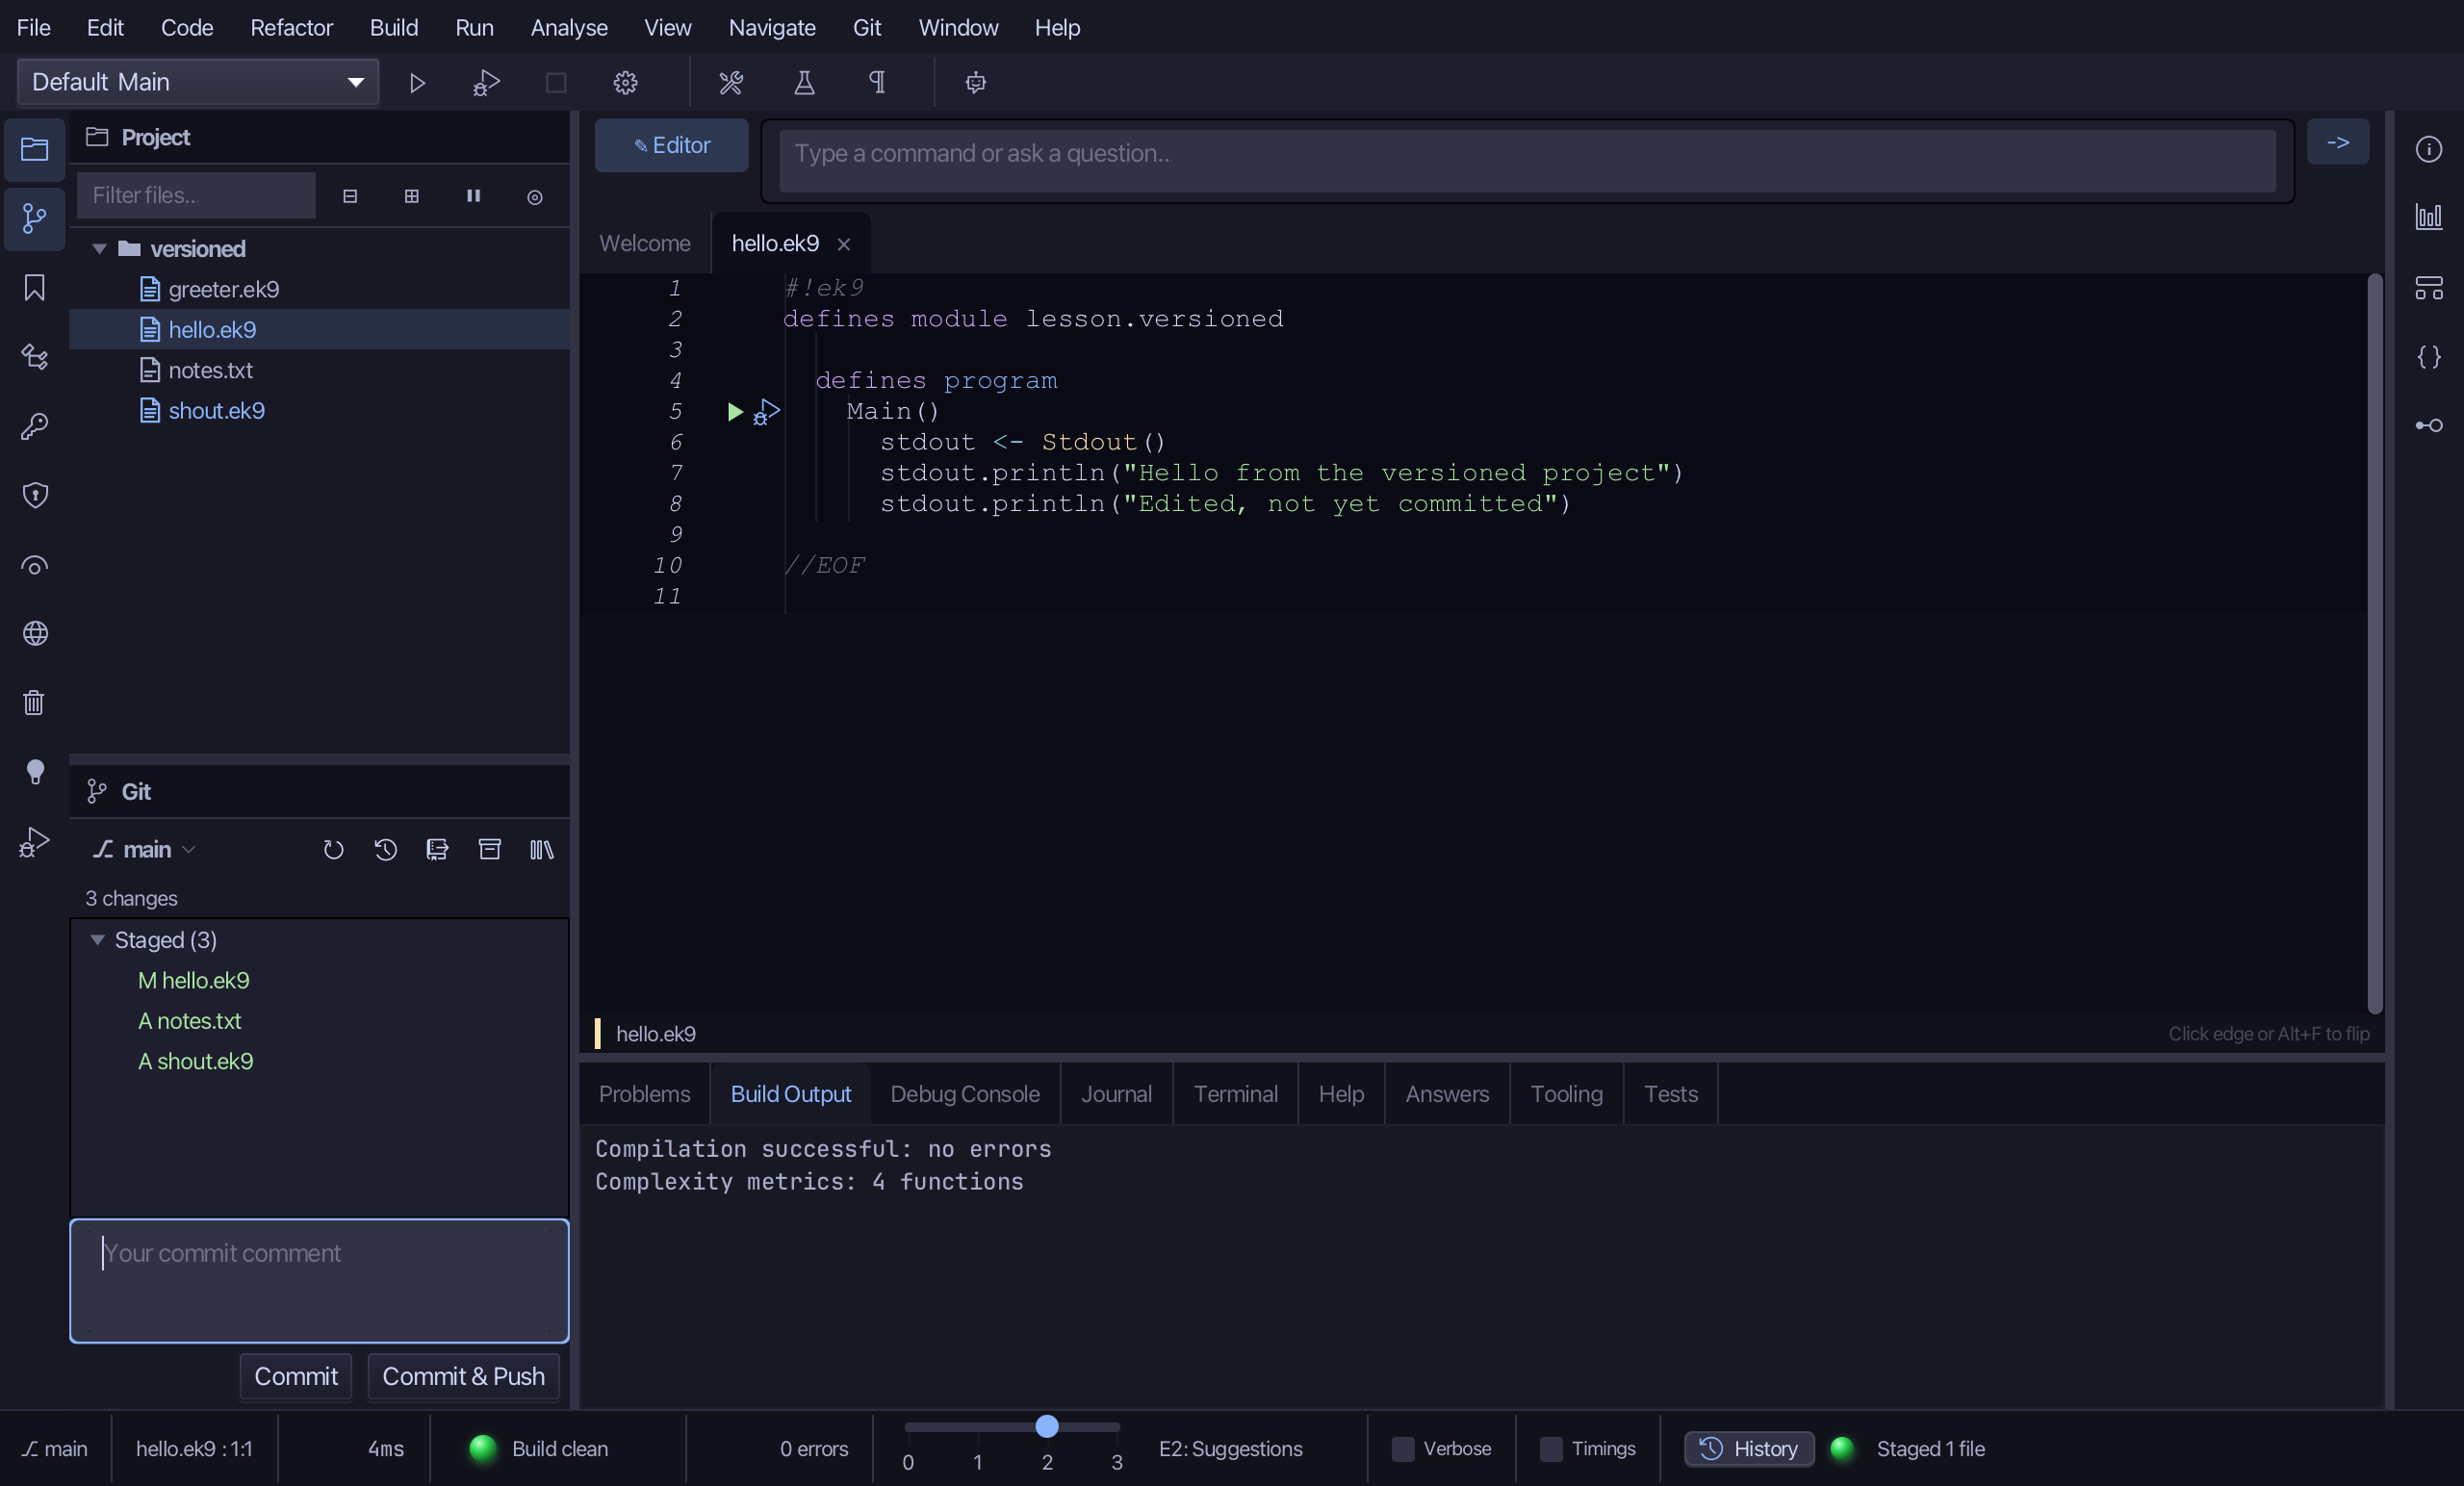
Type Say hello twice in the commit comment box and choose Commit.
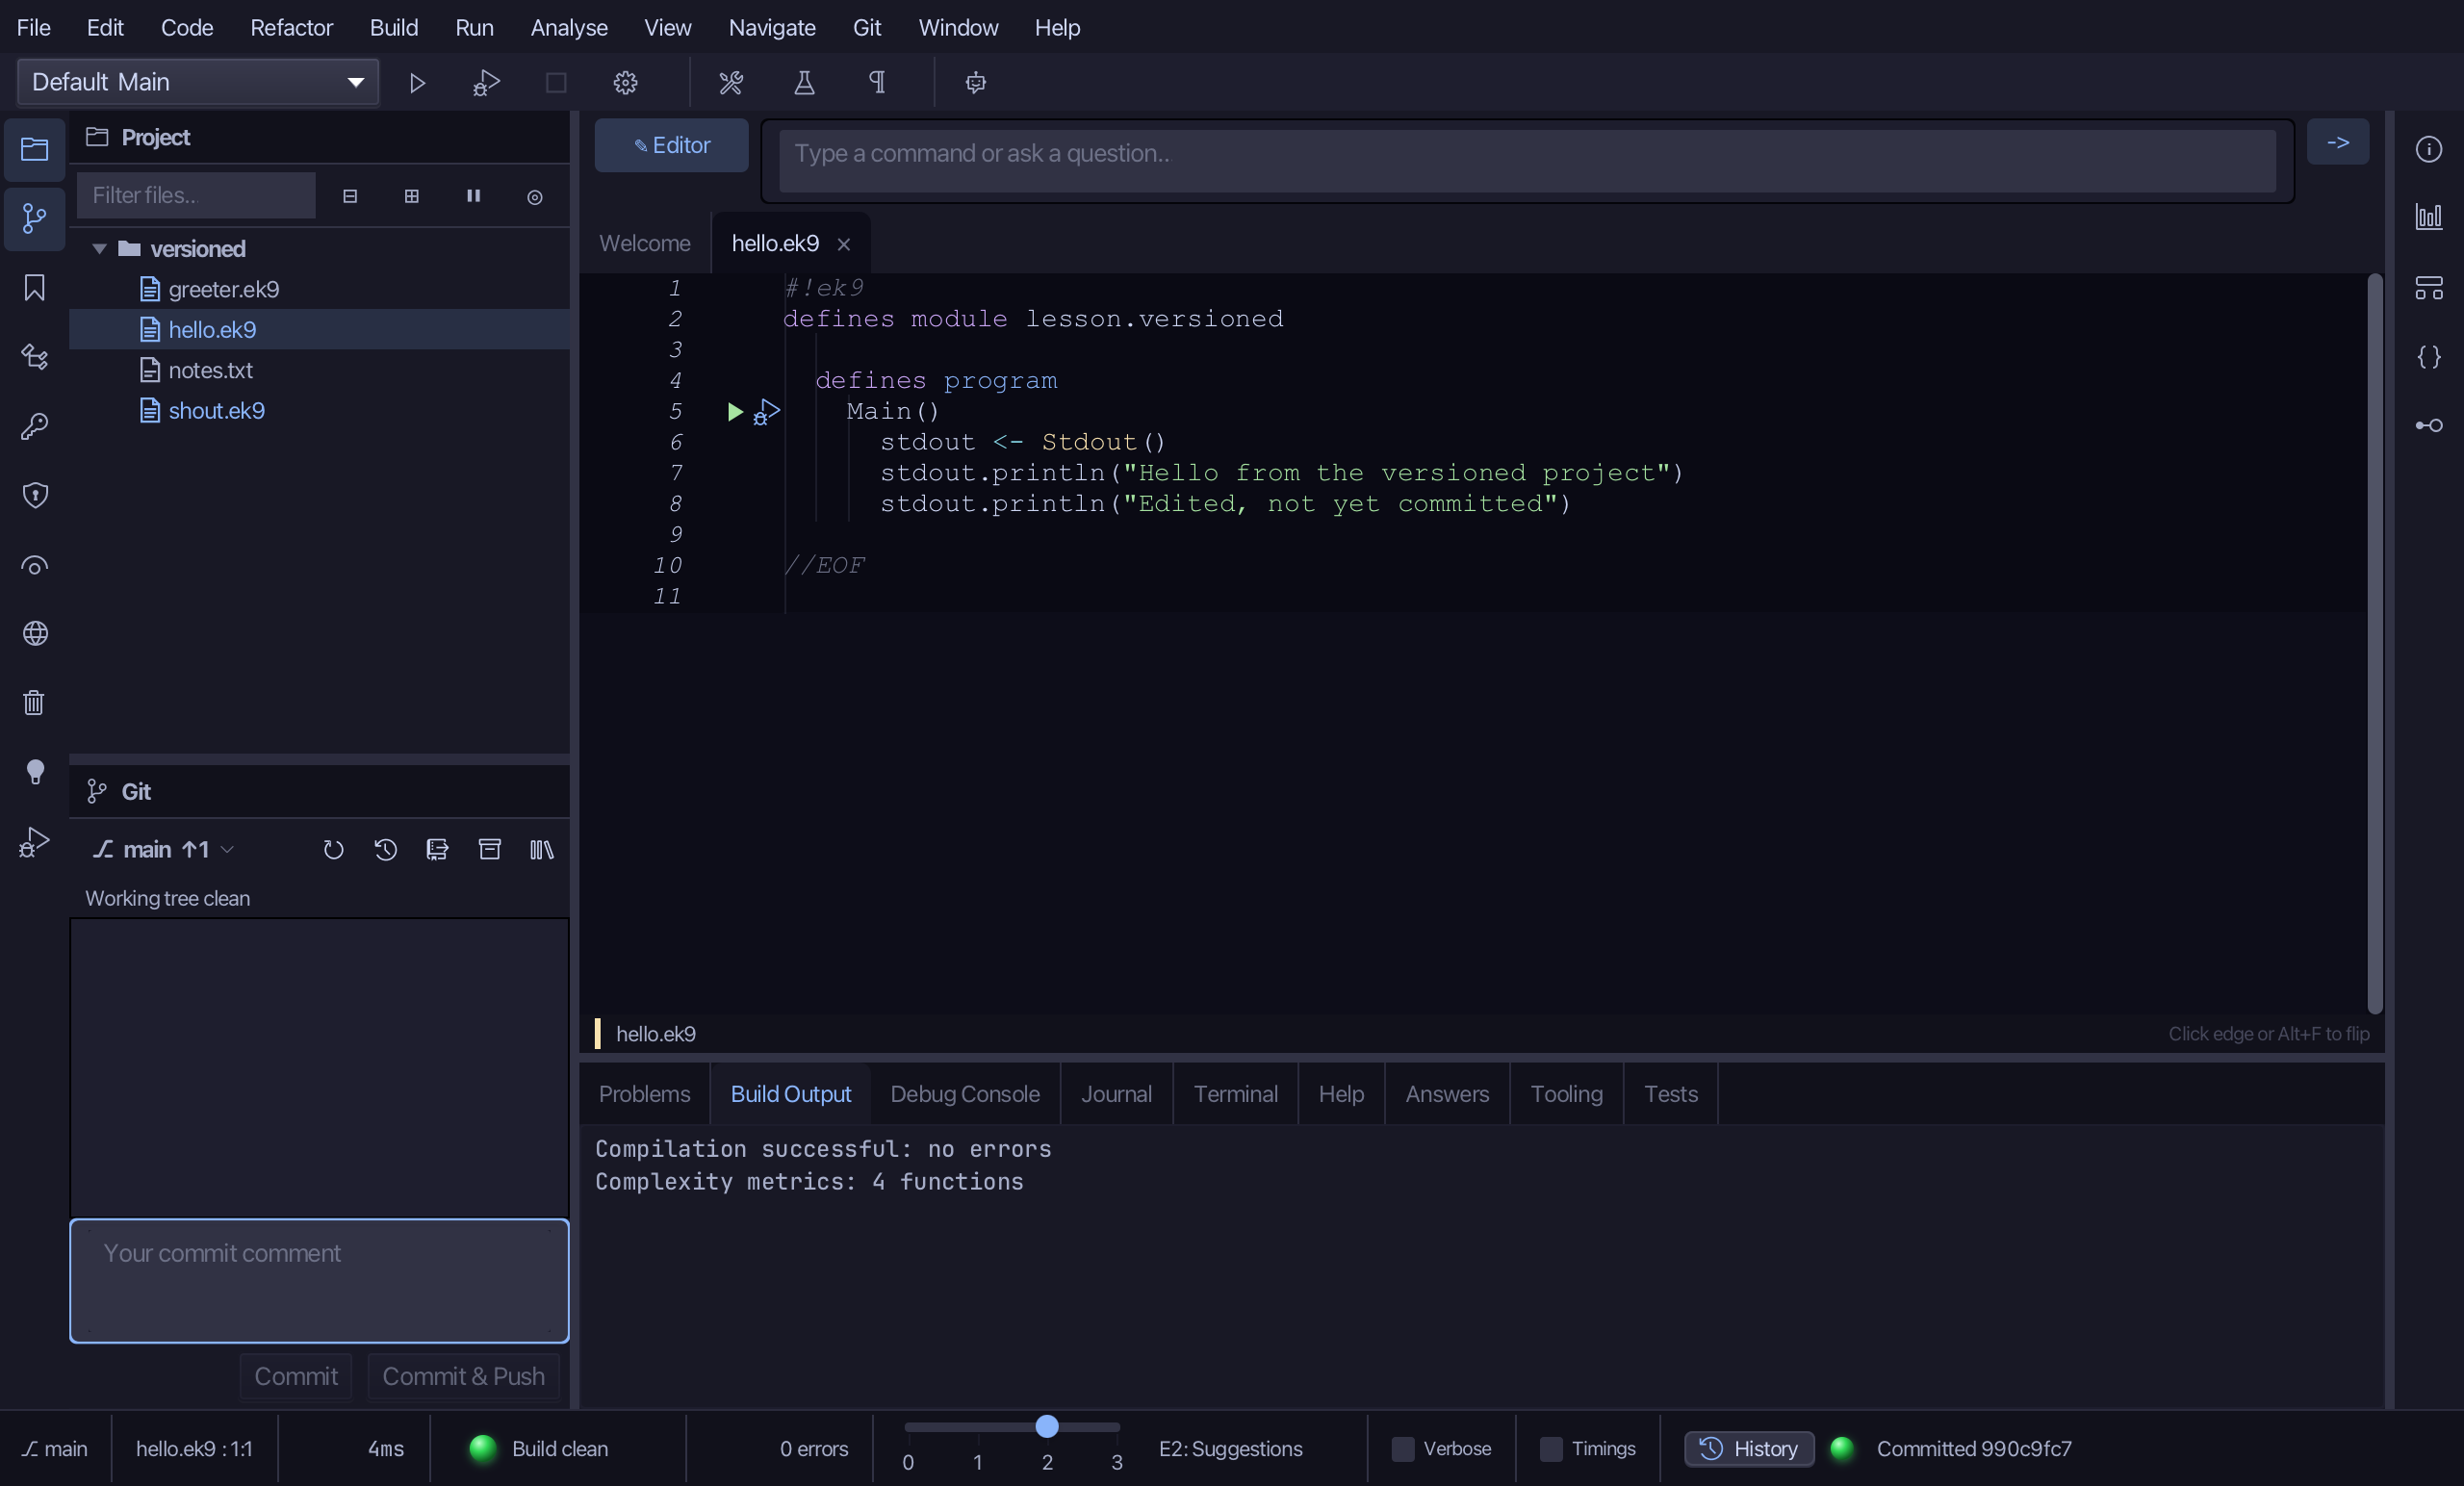
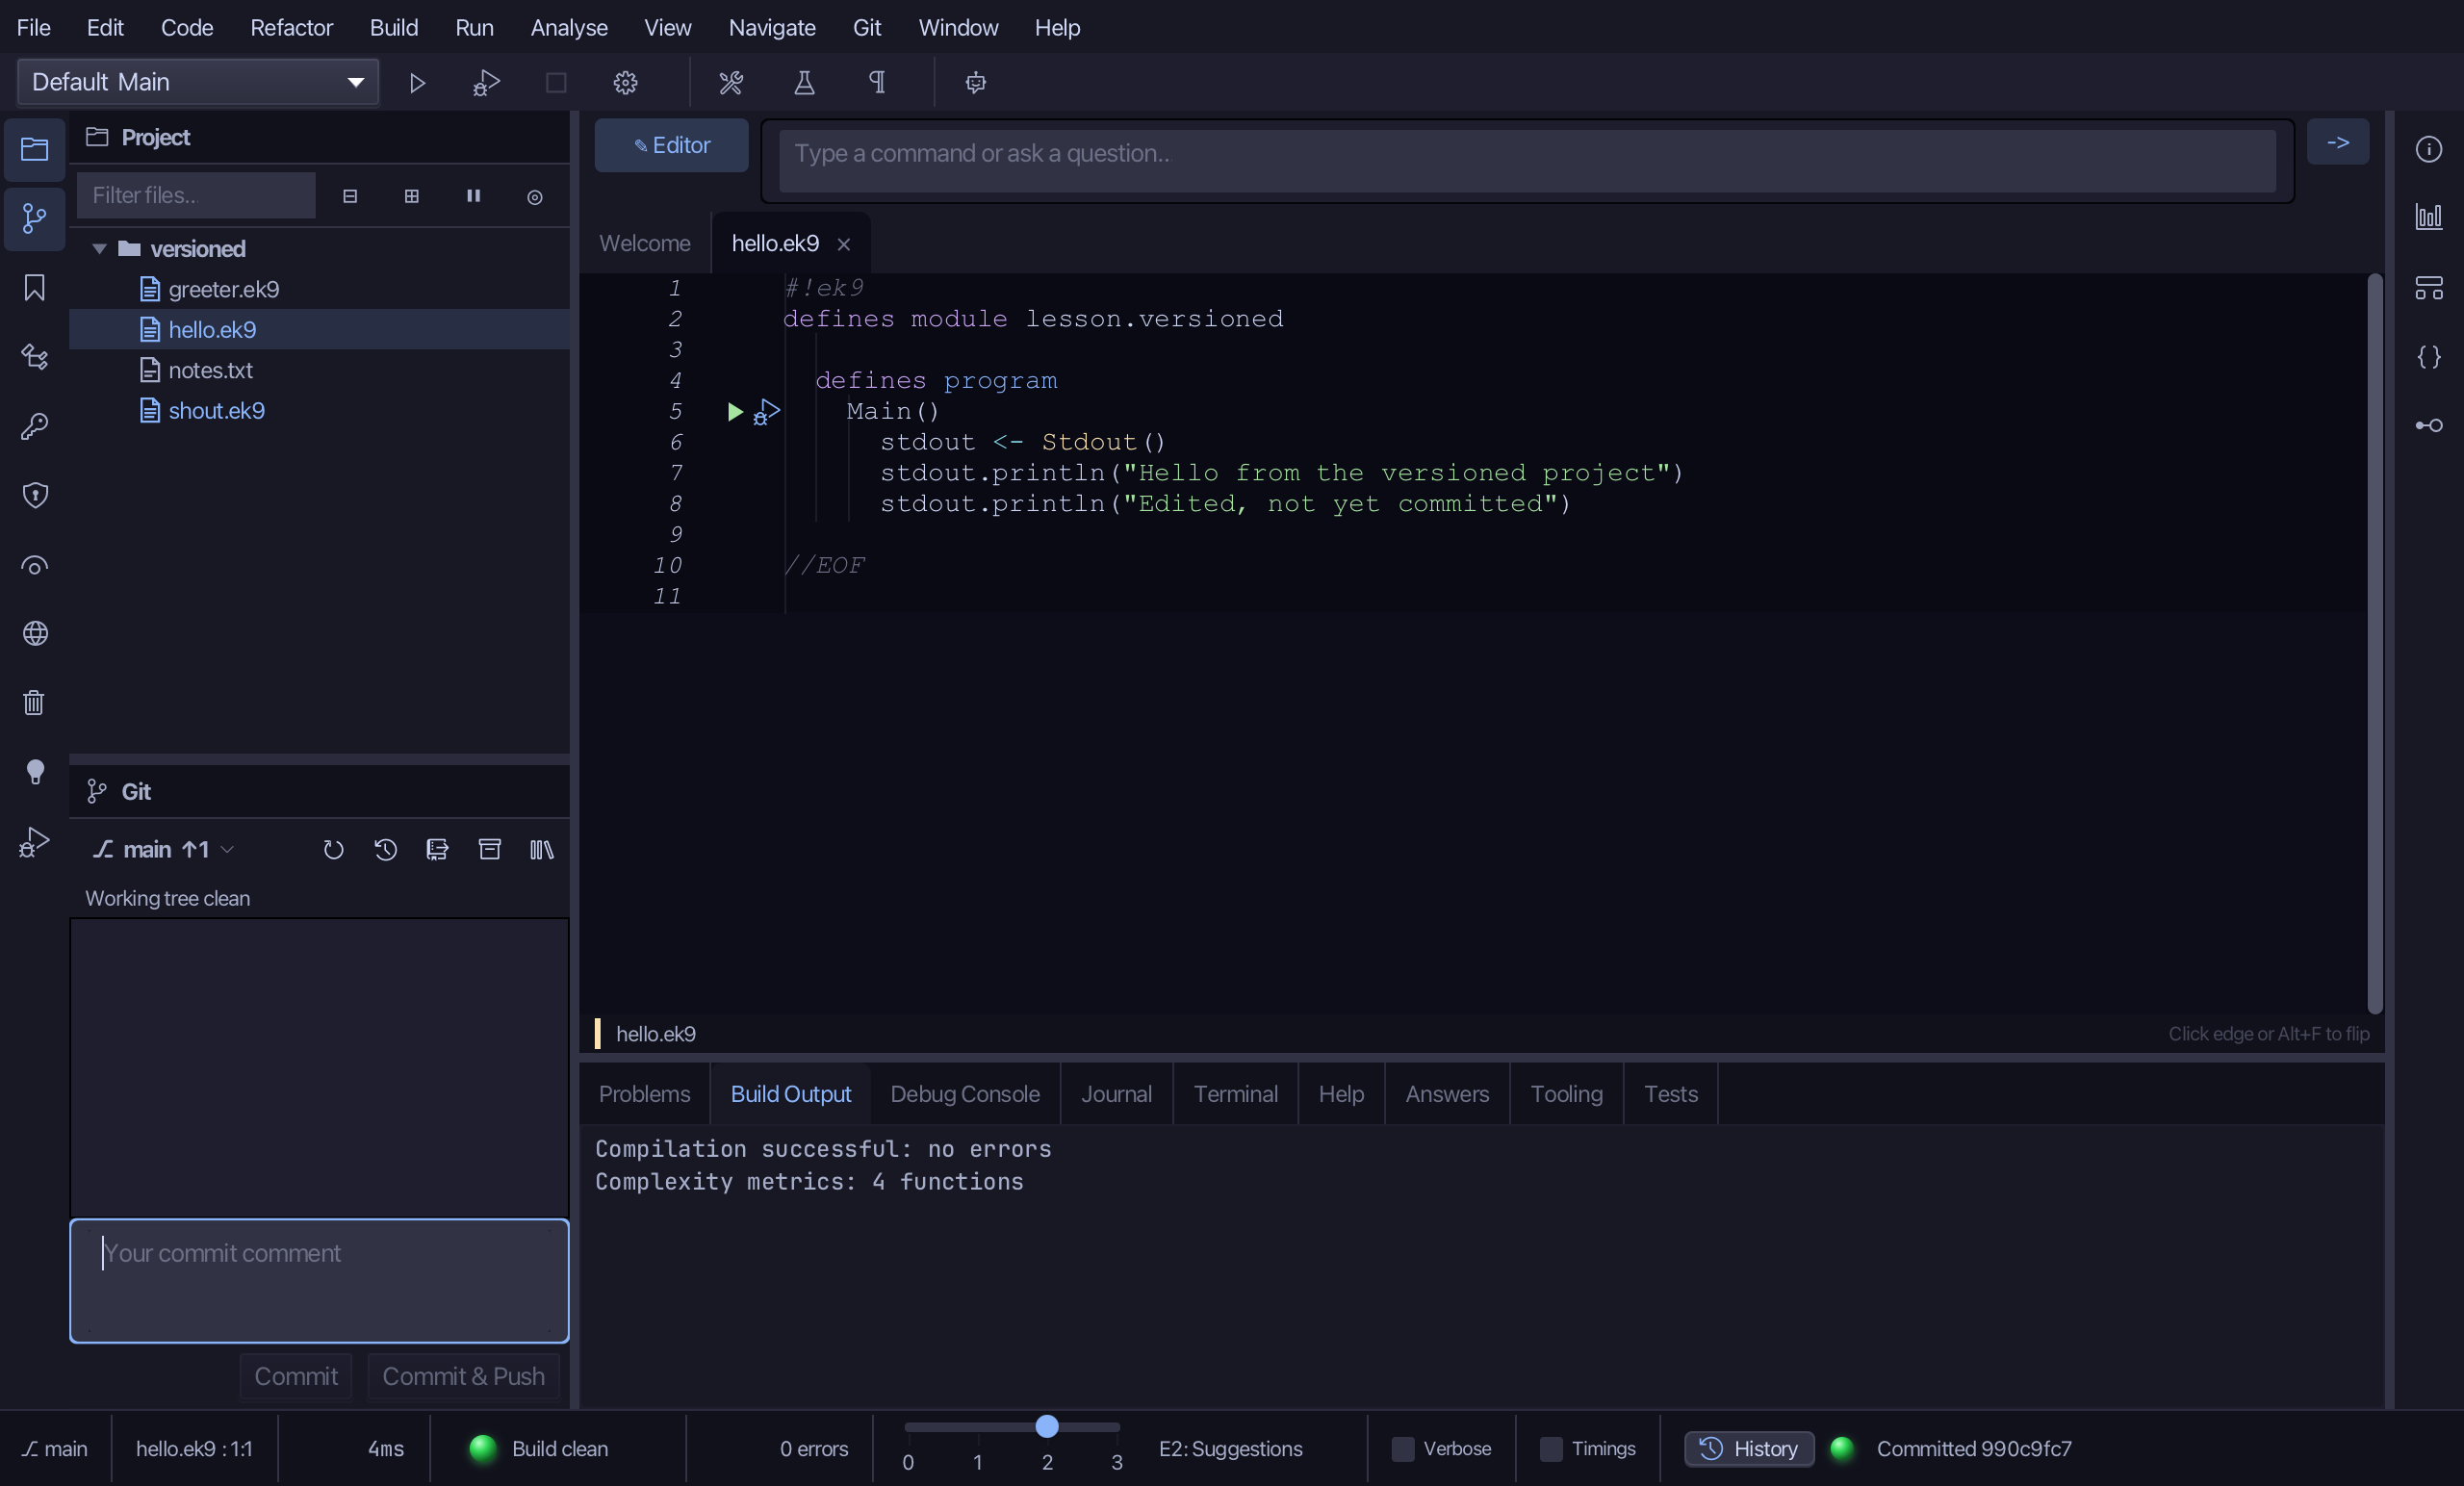
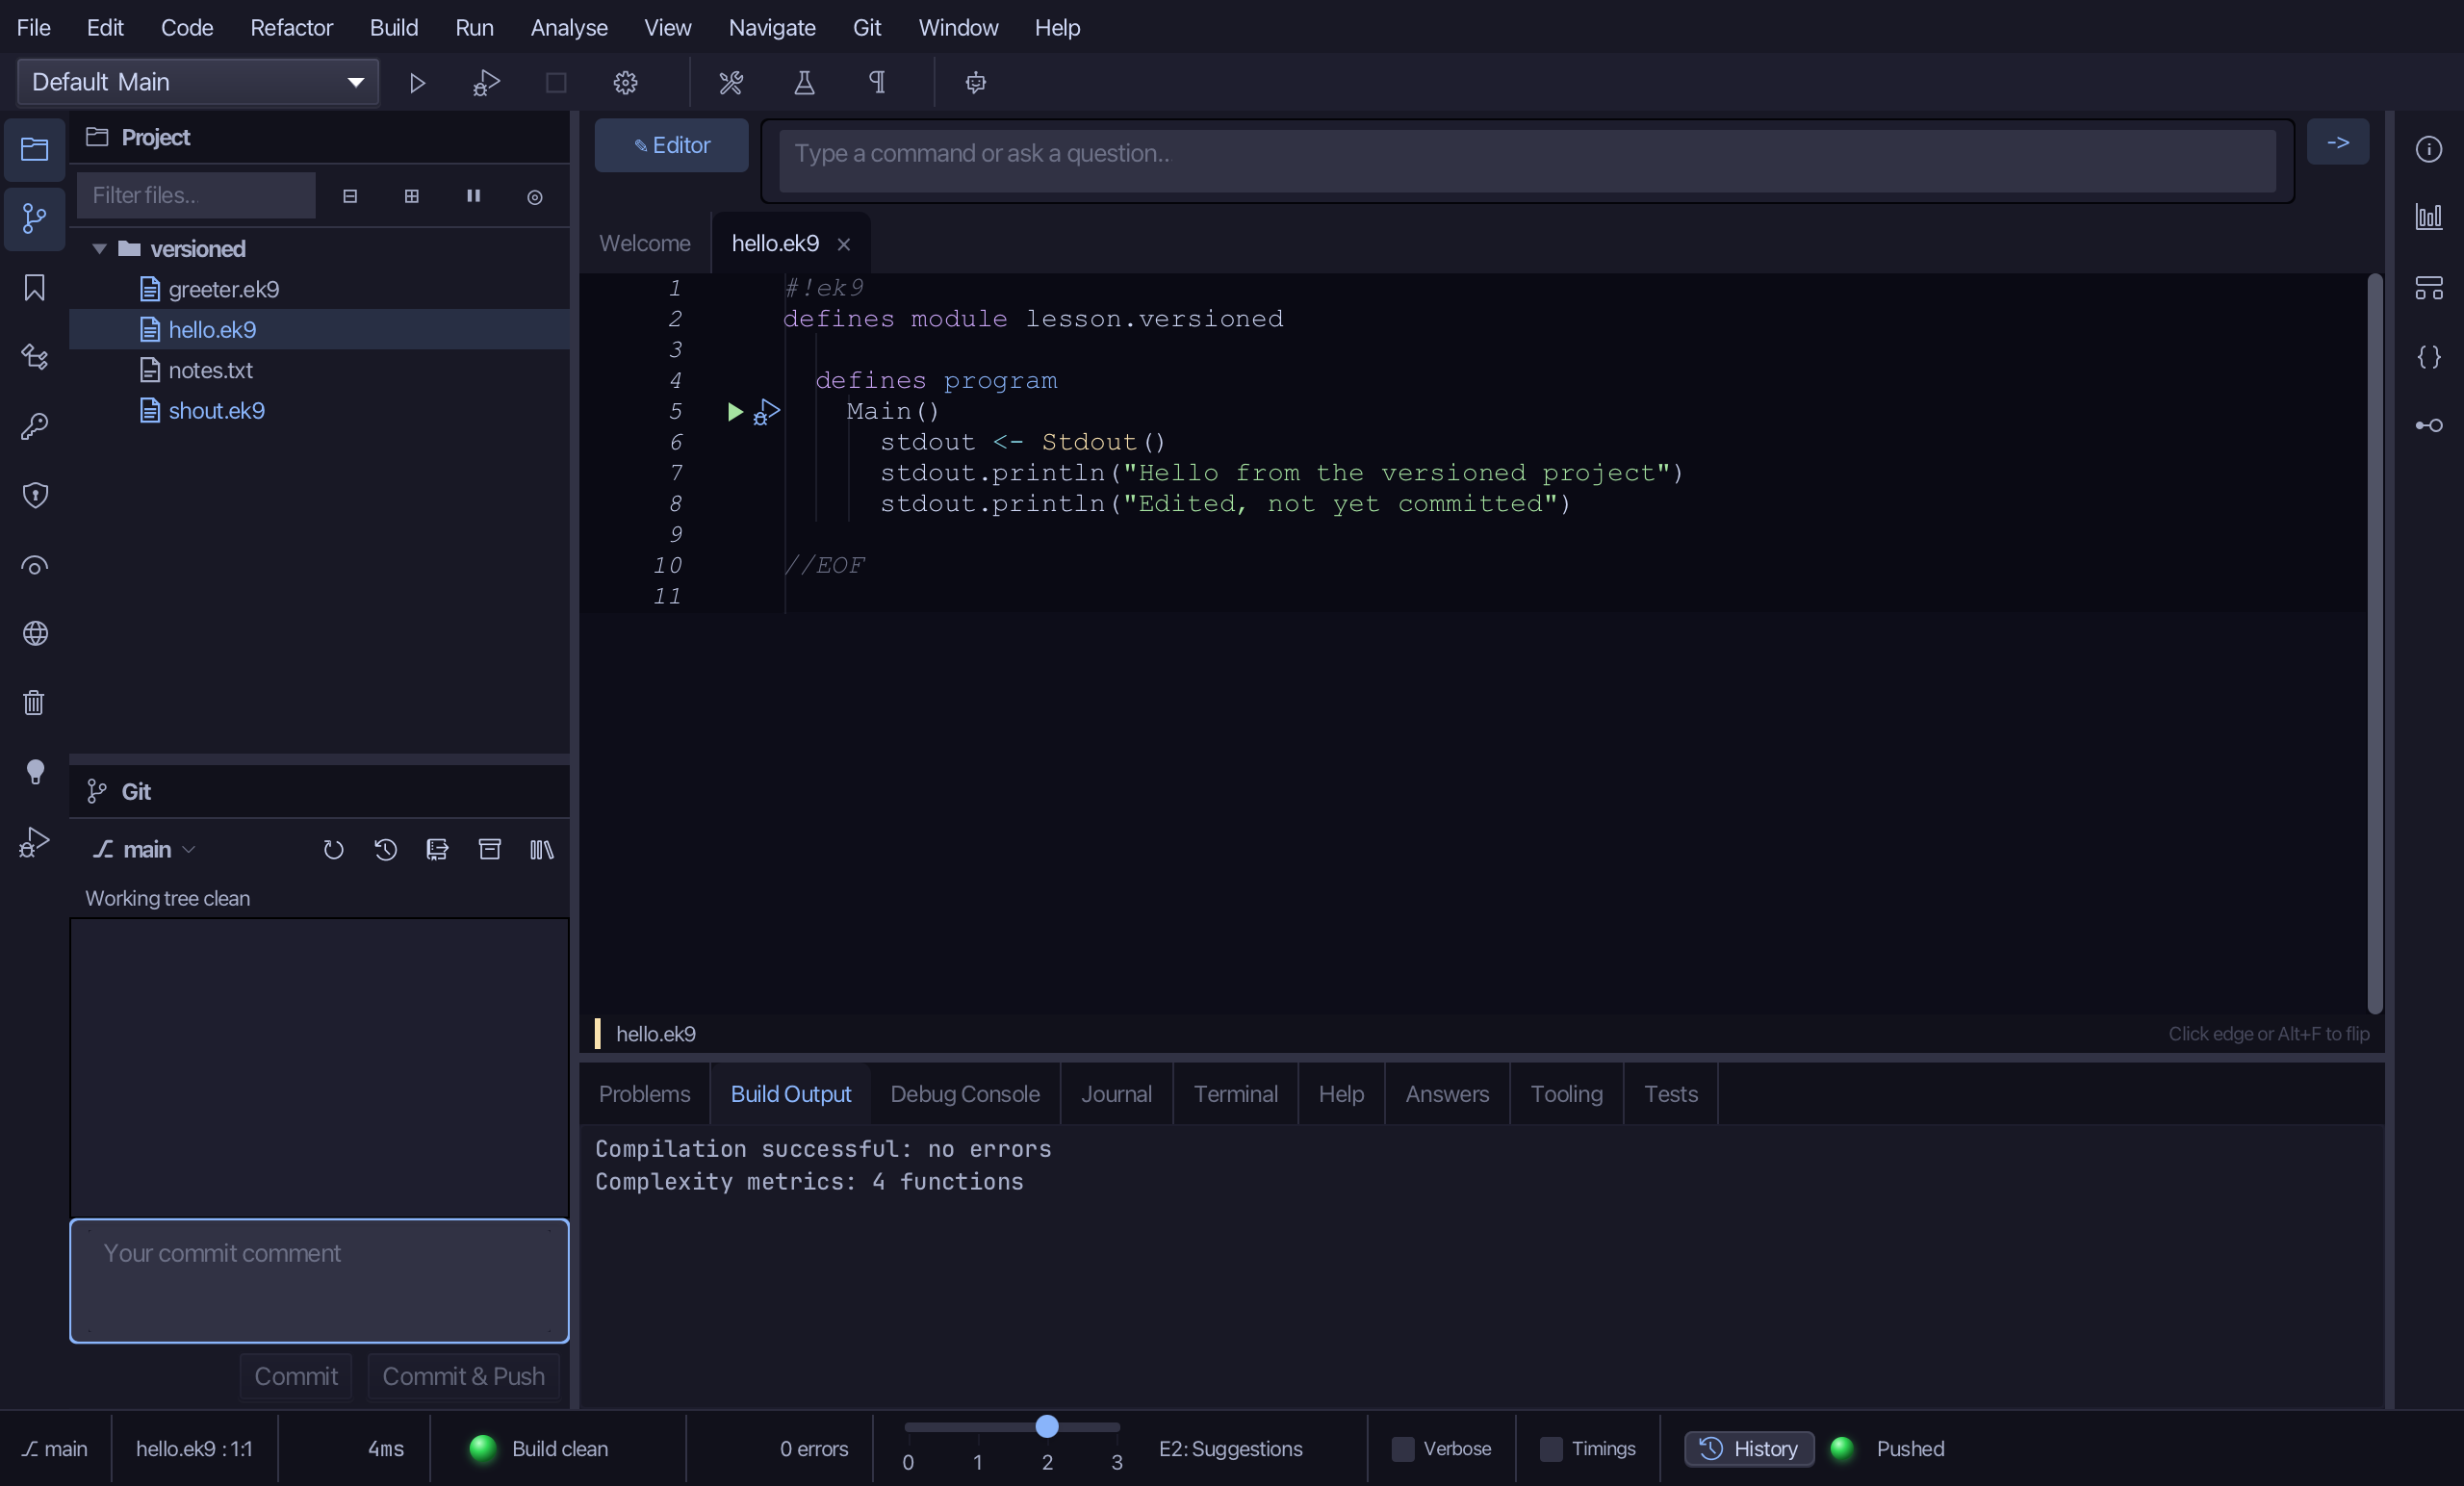
All three files went into the one commit, so the window now reads working tree clean - and the branch reads ↑1: one commit here that the remote has not got.
Step 3: Push
Choose Git ▸ Push (⇧⌘K).
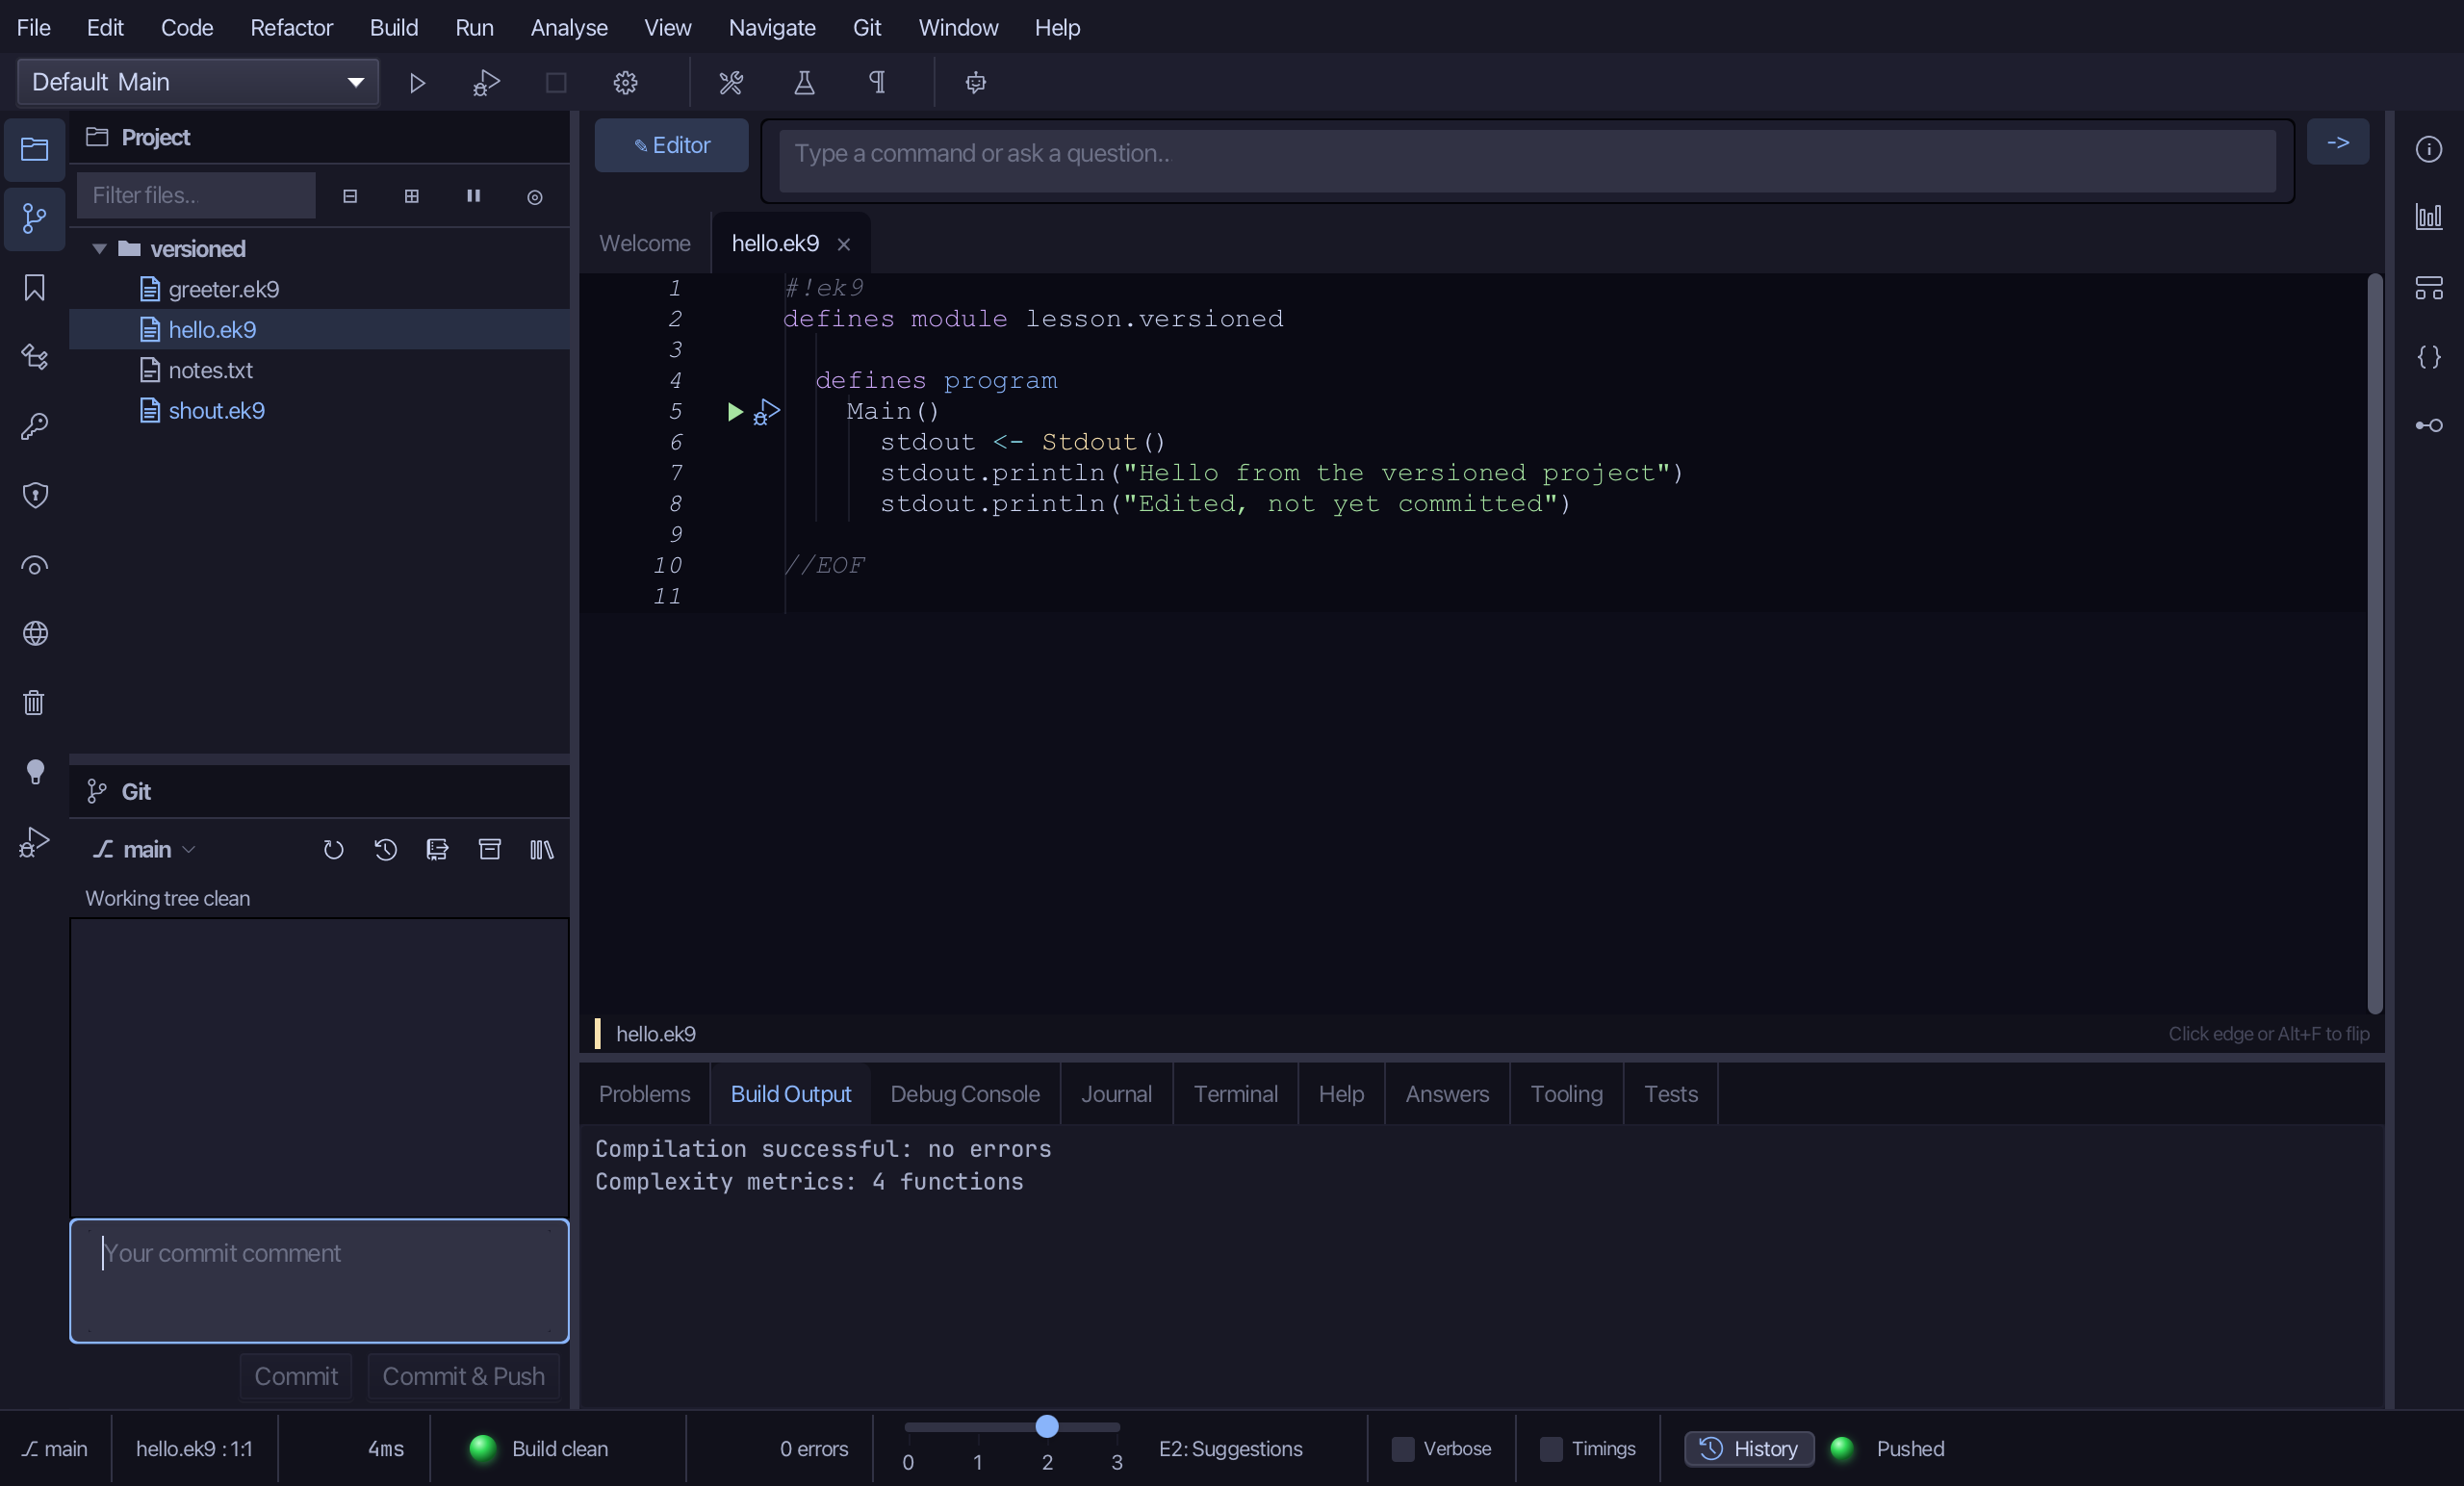
The ↑1 is gone: the remote - a folder beside this project, made for the lesson - has the commit. Push sends the current branch to origin; it is refused, never forced, when the remote has moved on.
Step 4: Fetch and pull
Someone else has just pushed a commit to the remote. Choose Git ▸ Fetch to look - it brings in what is there and changes none of your files.
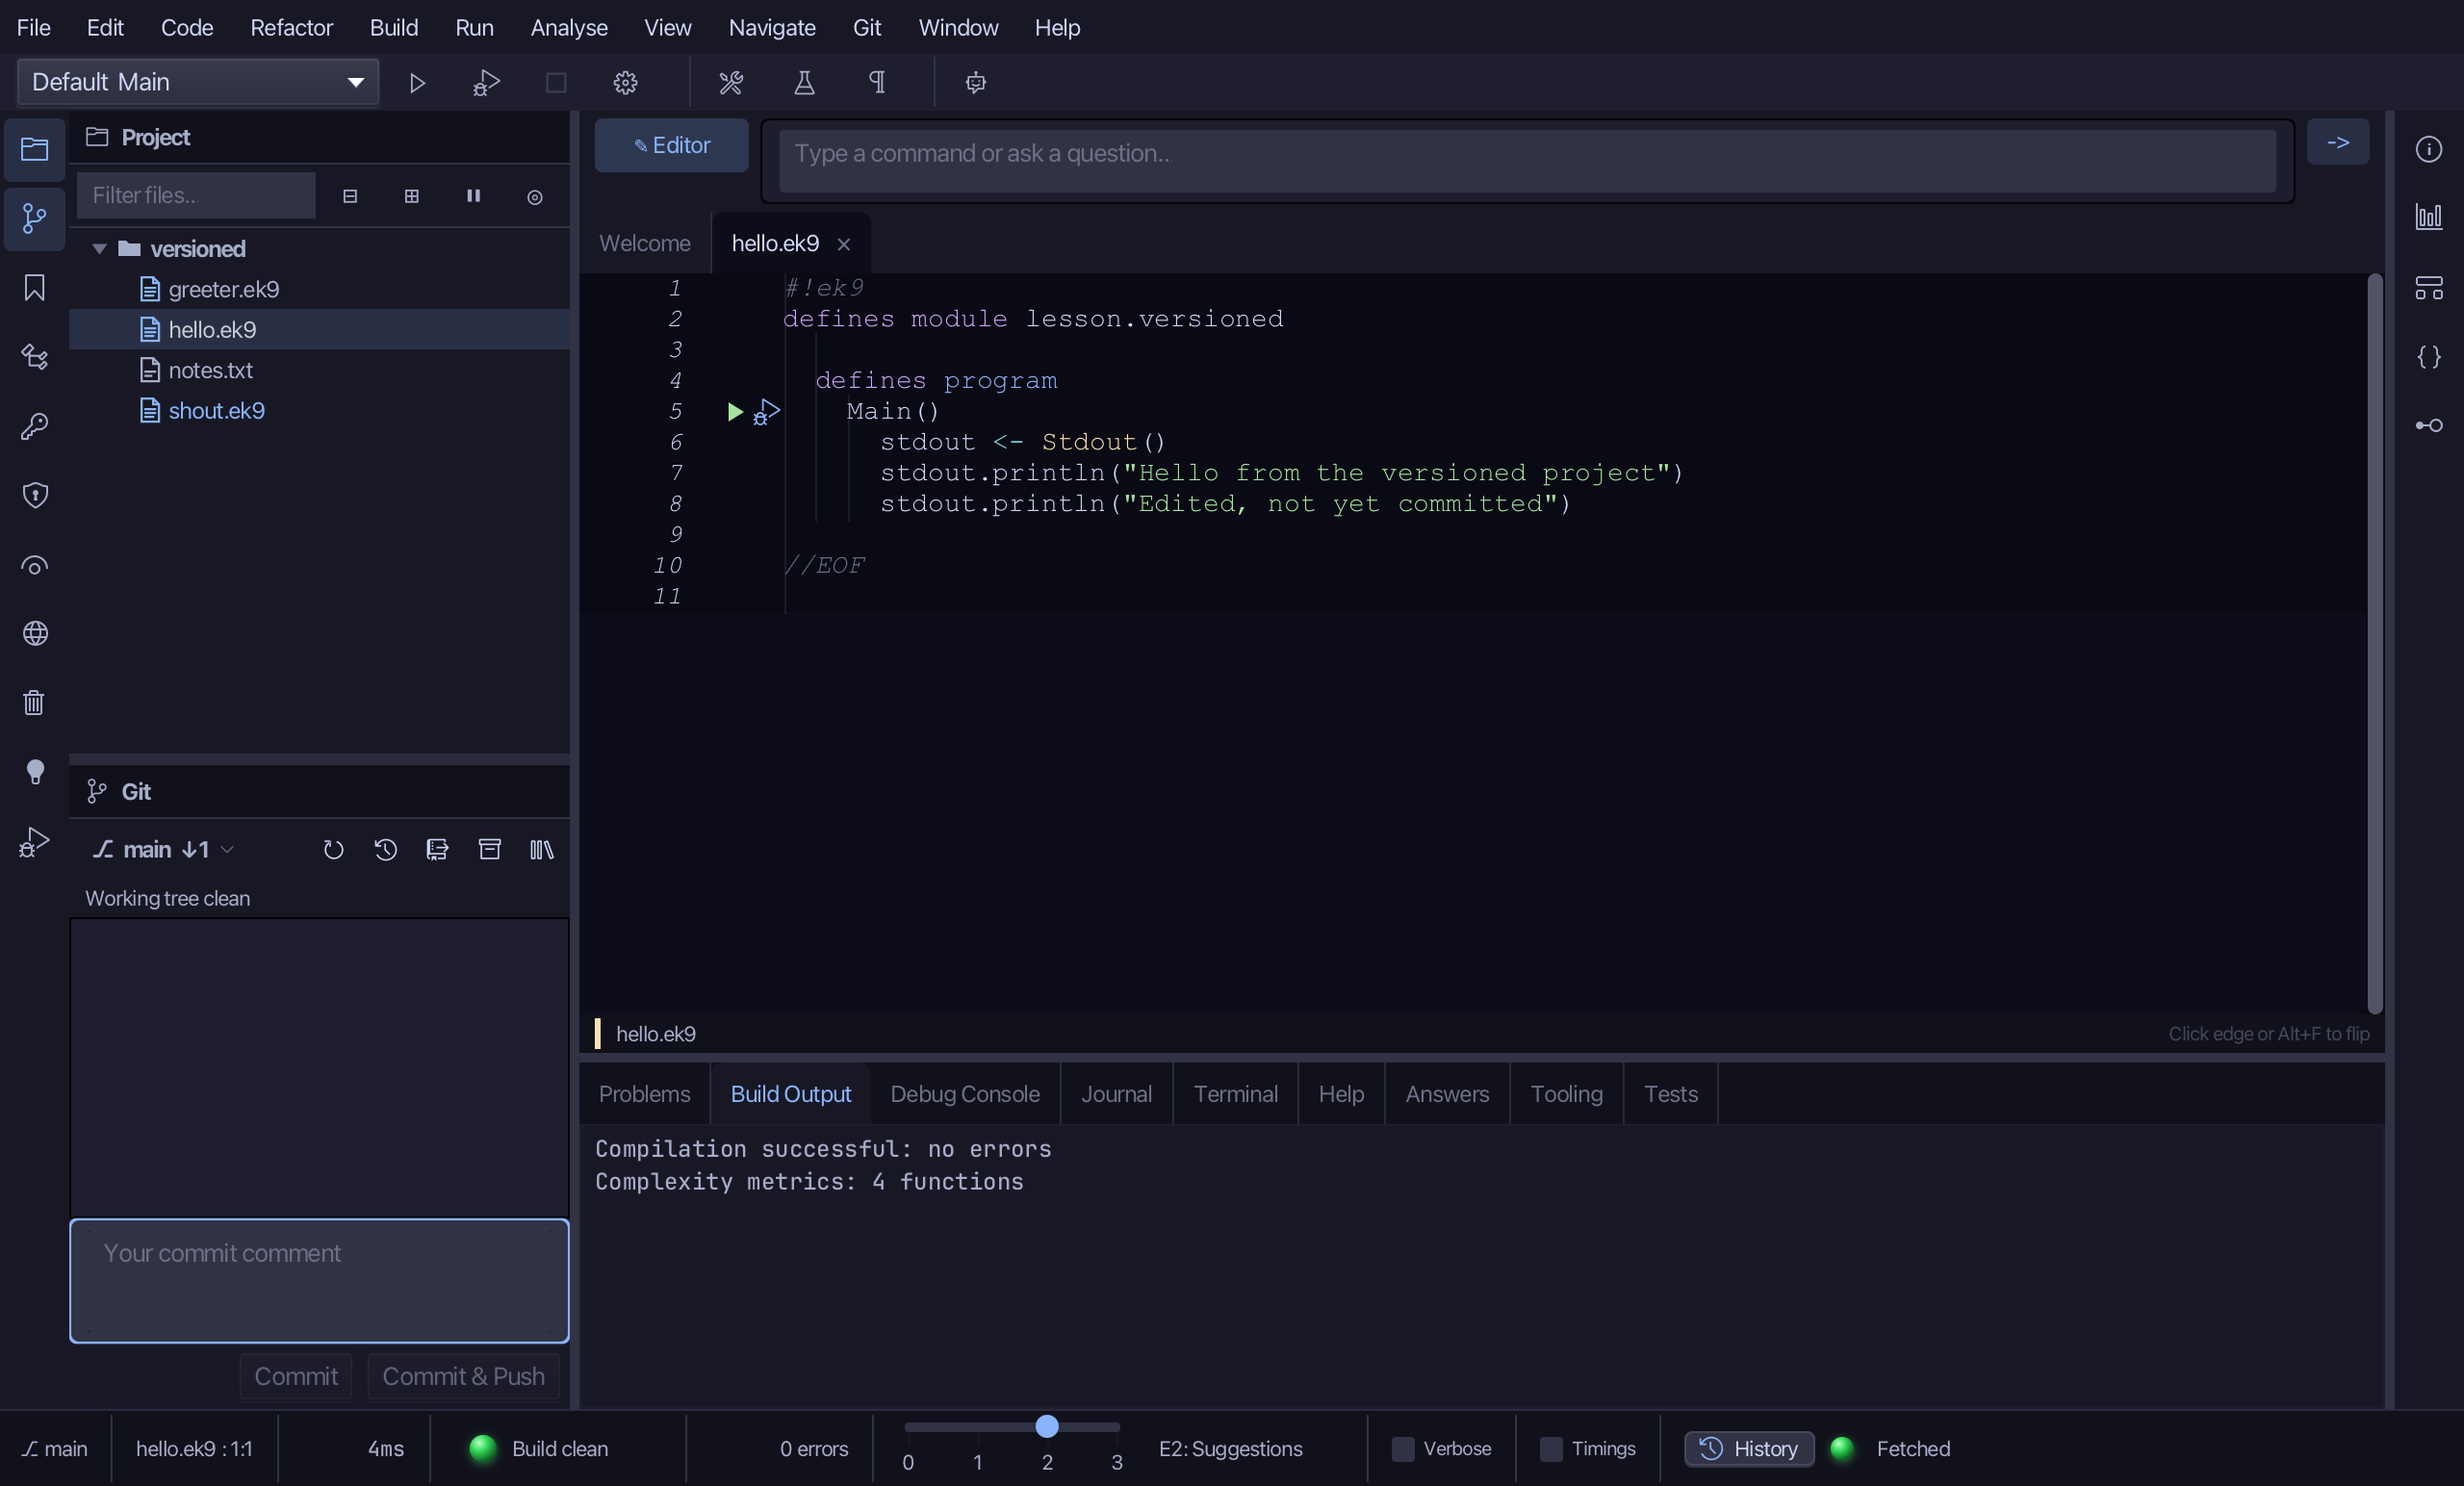
The branch now reads ↓1. Choose Git ▸ Pull (⌘P).
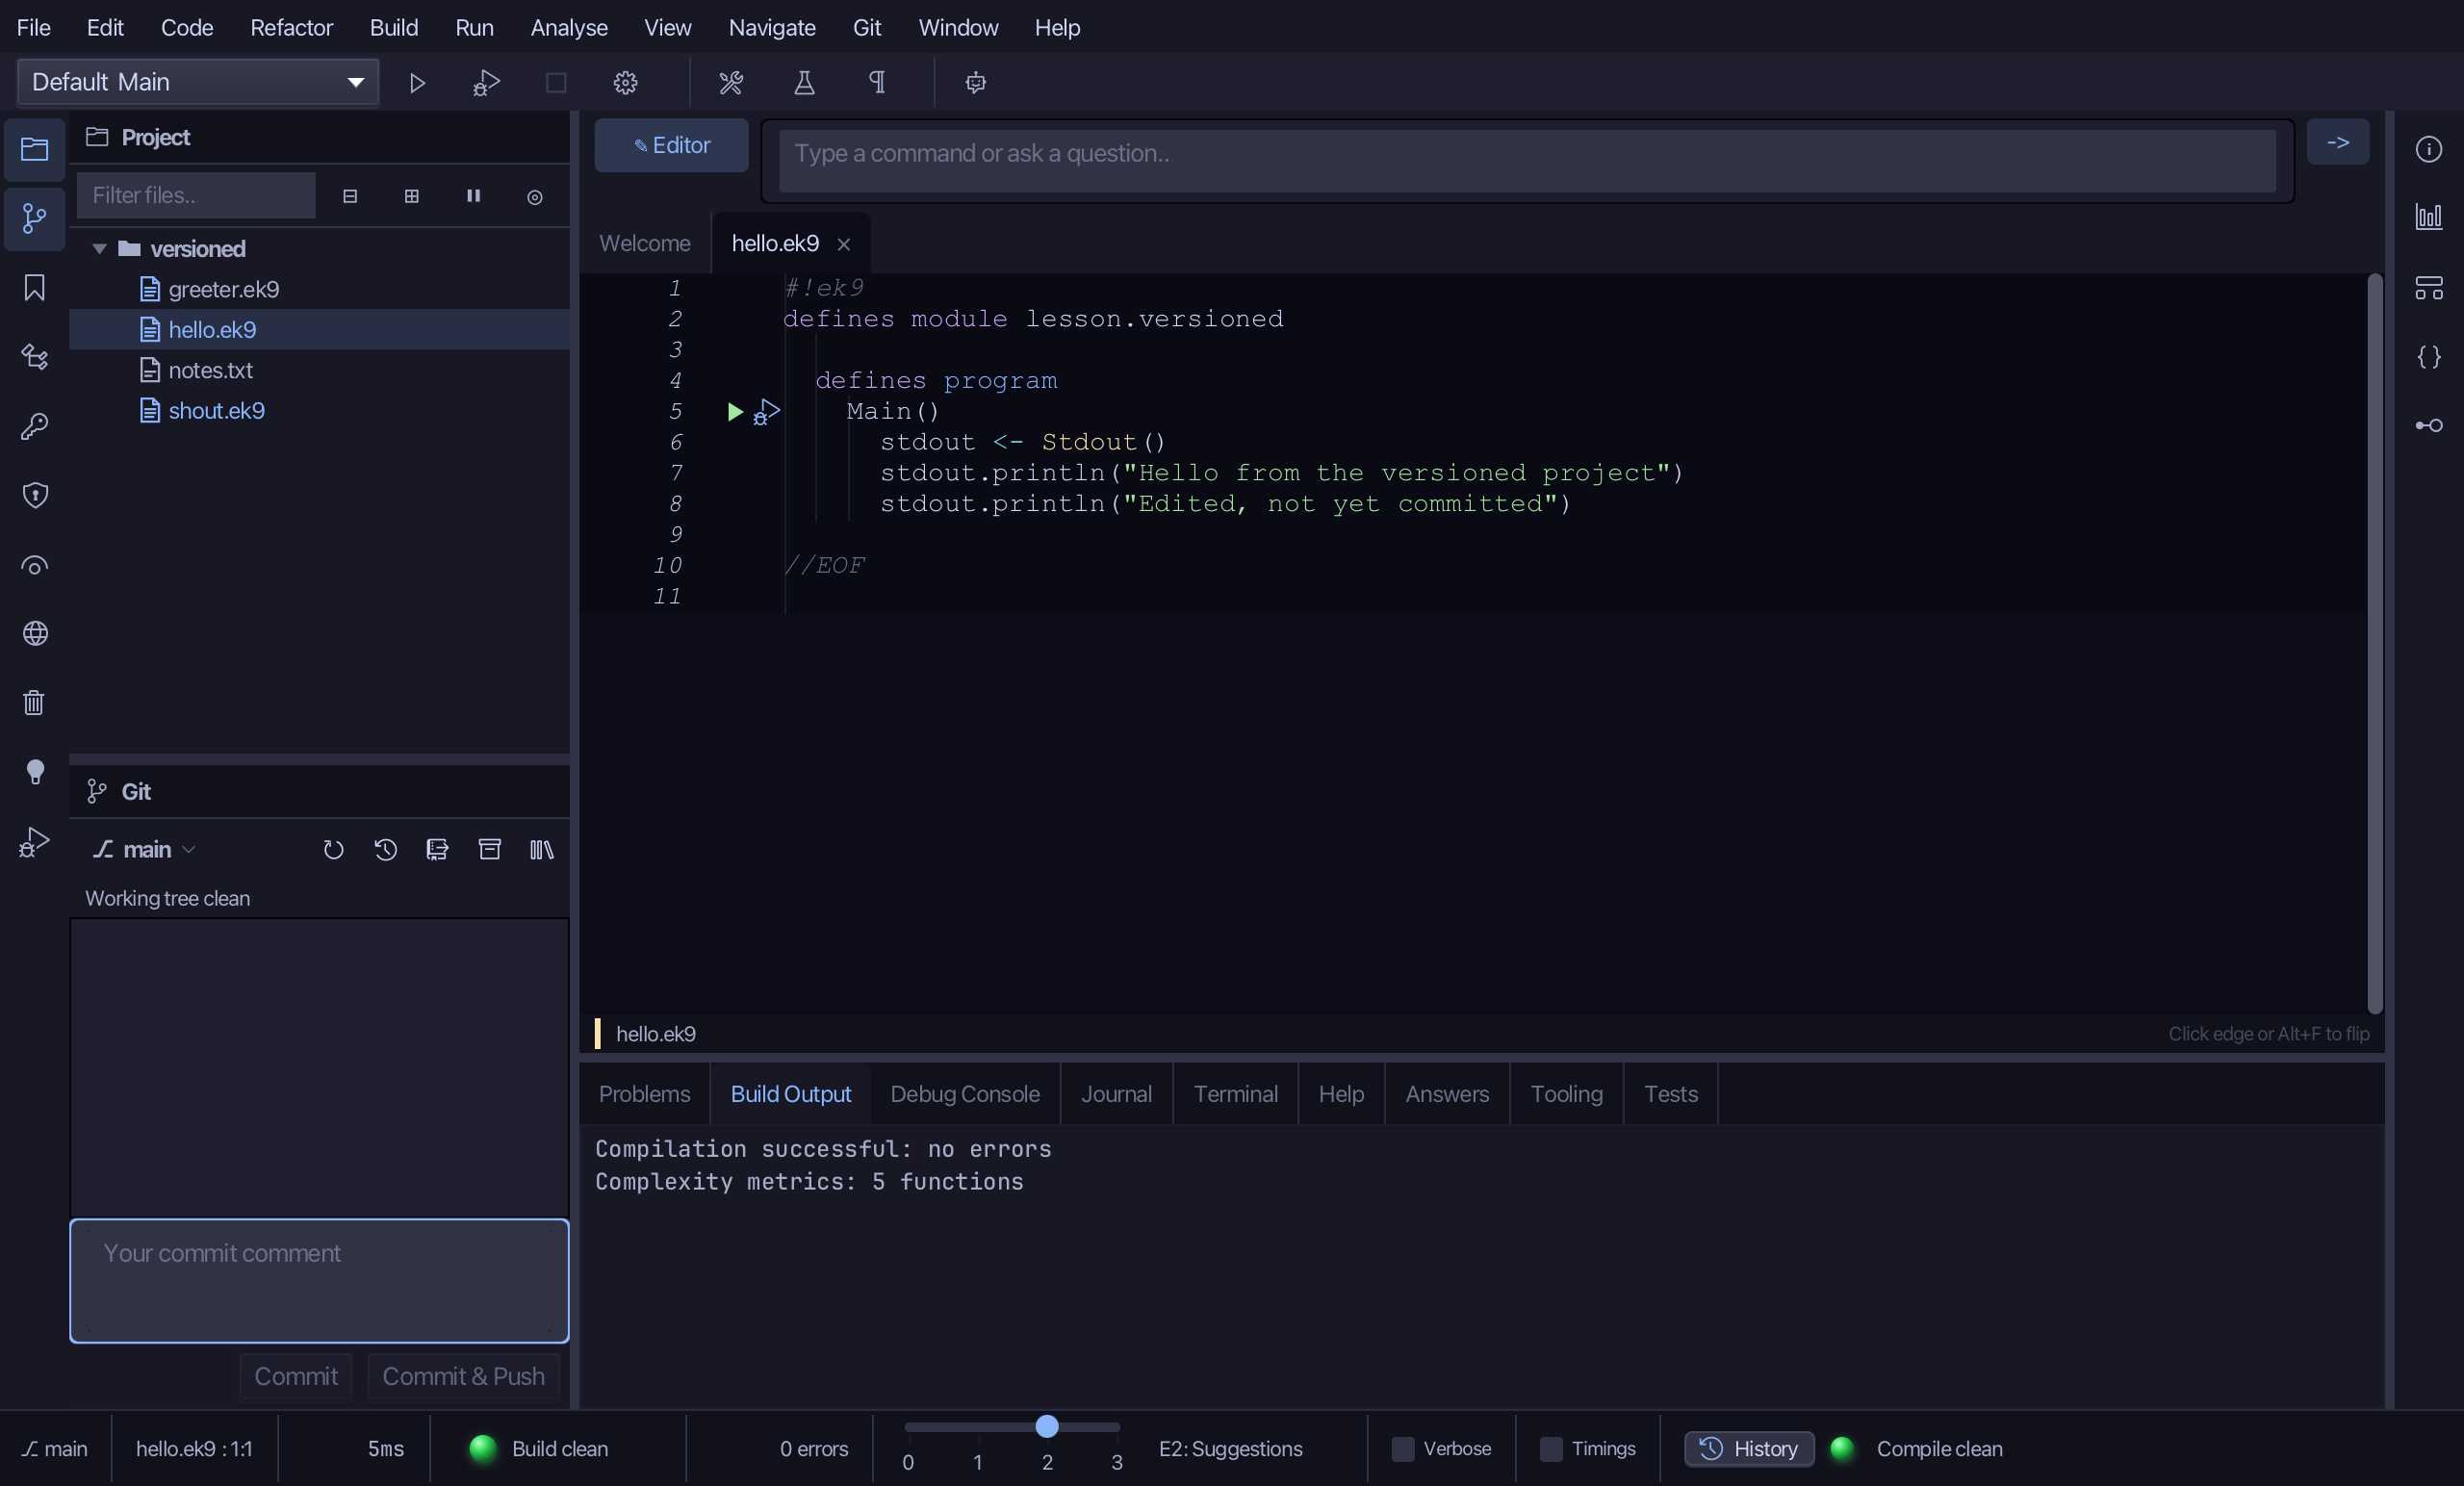
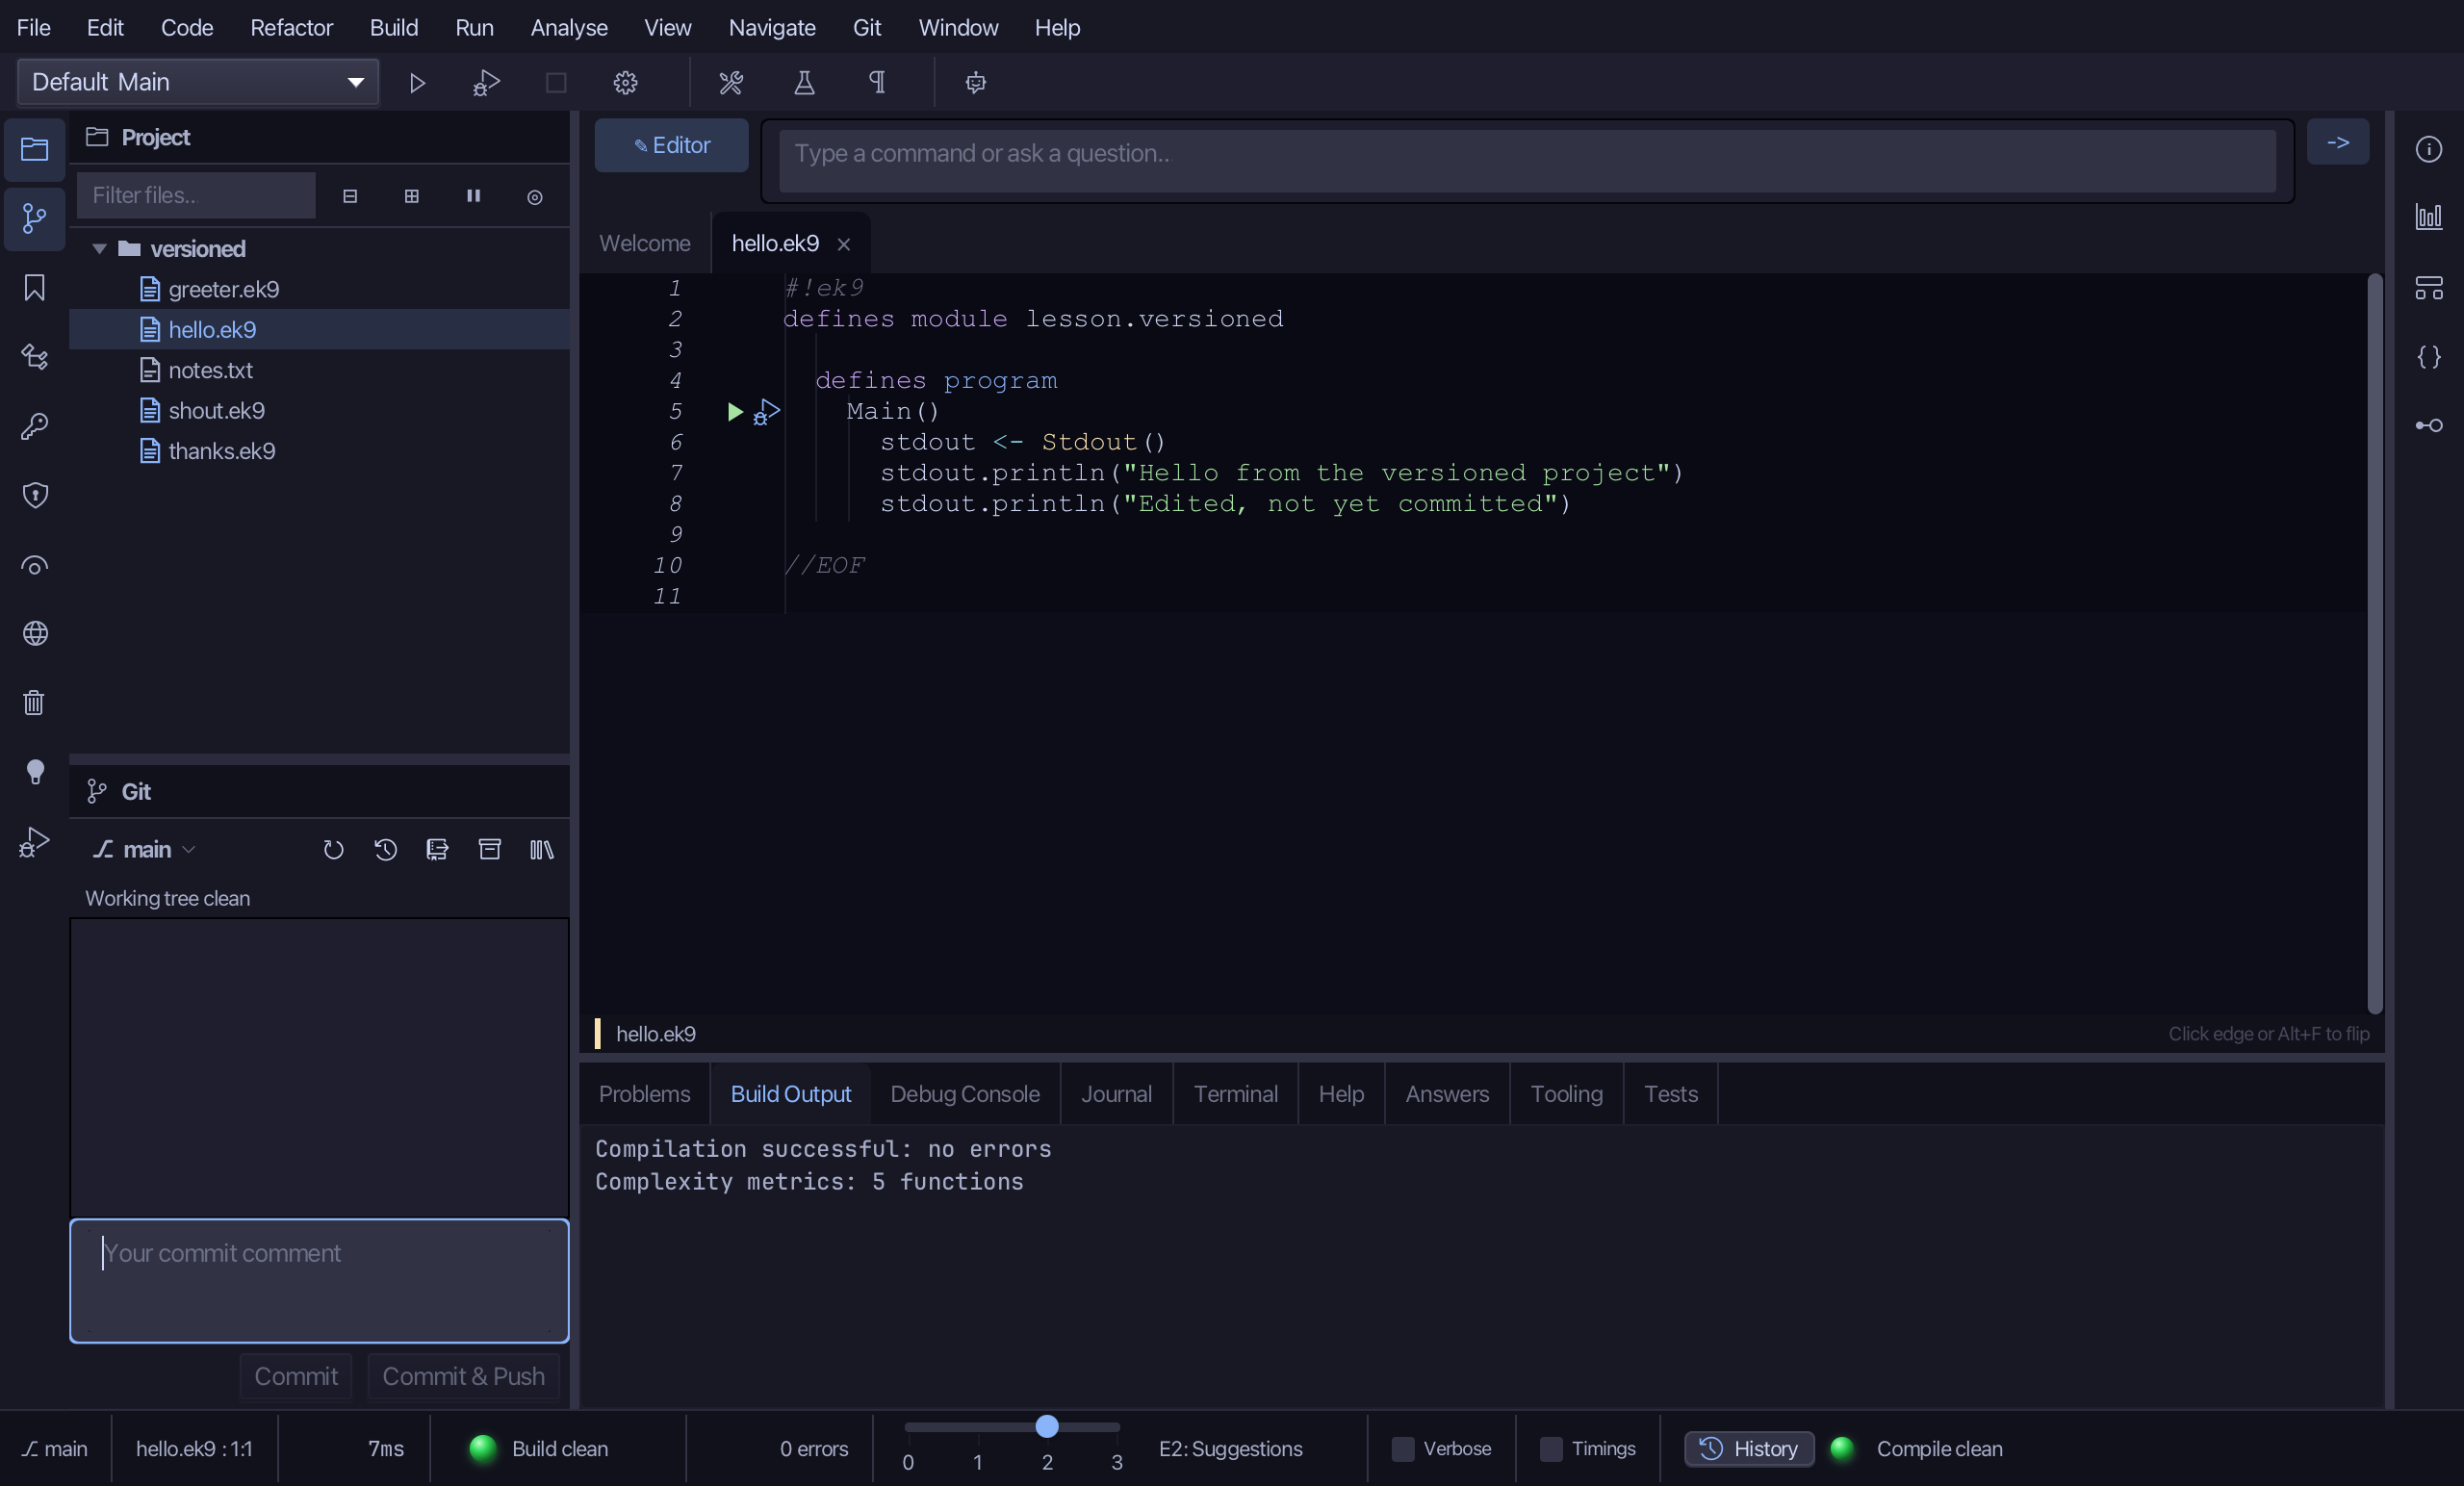
Pull fast-forwards main to what the remote has: the ↓1 is gone and the log holds Add thanks function. It only ever fast-forwards, and it refuses a working tree with changes in it - which is why you committed first.
Step 5: Branches
Choose Git ▸ Branches….
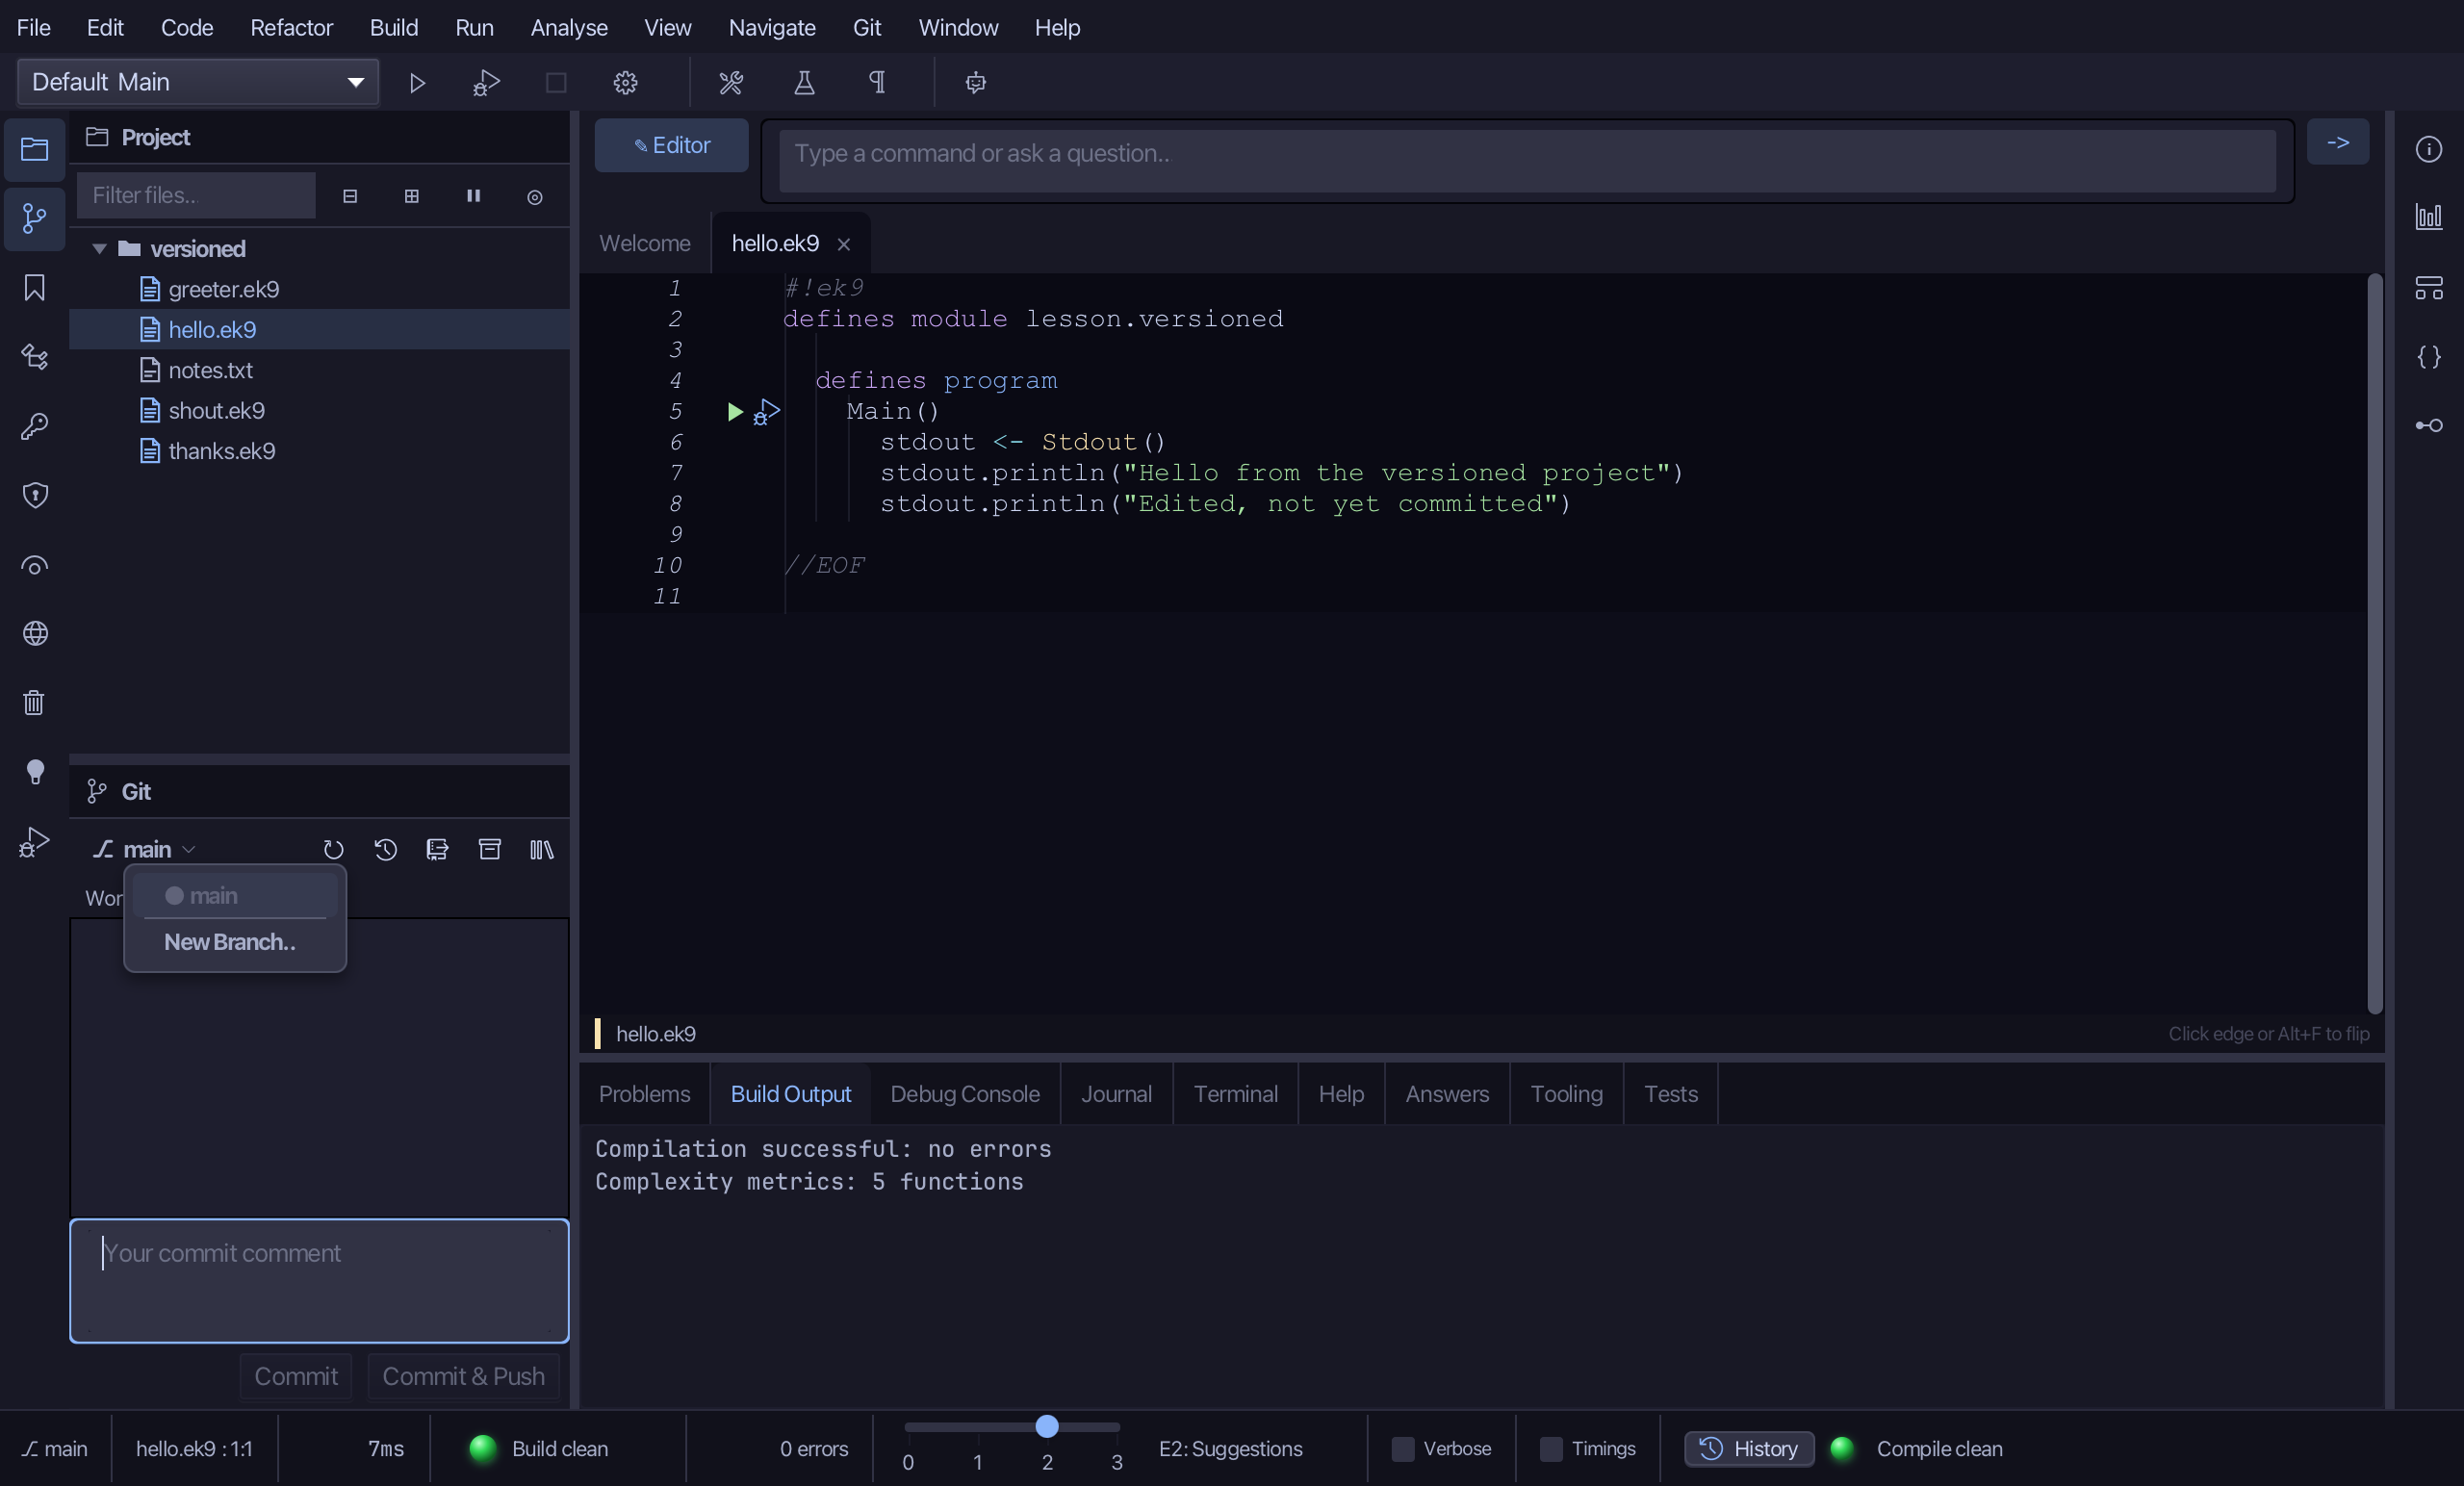
The list shows every branch, the current one marked ● and greyed. Choose New Branch….
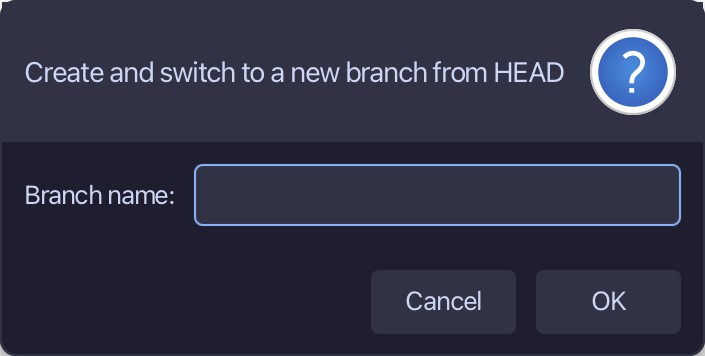
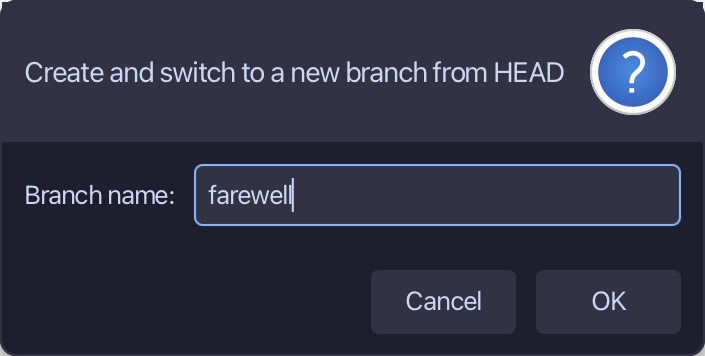
Type farewell as the branch name and choose OK.
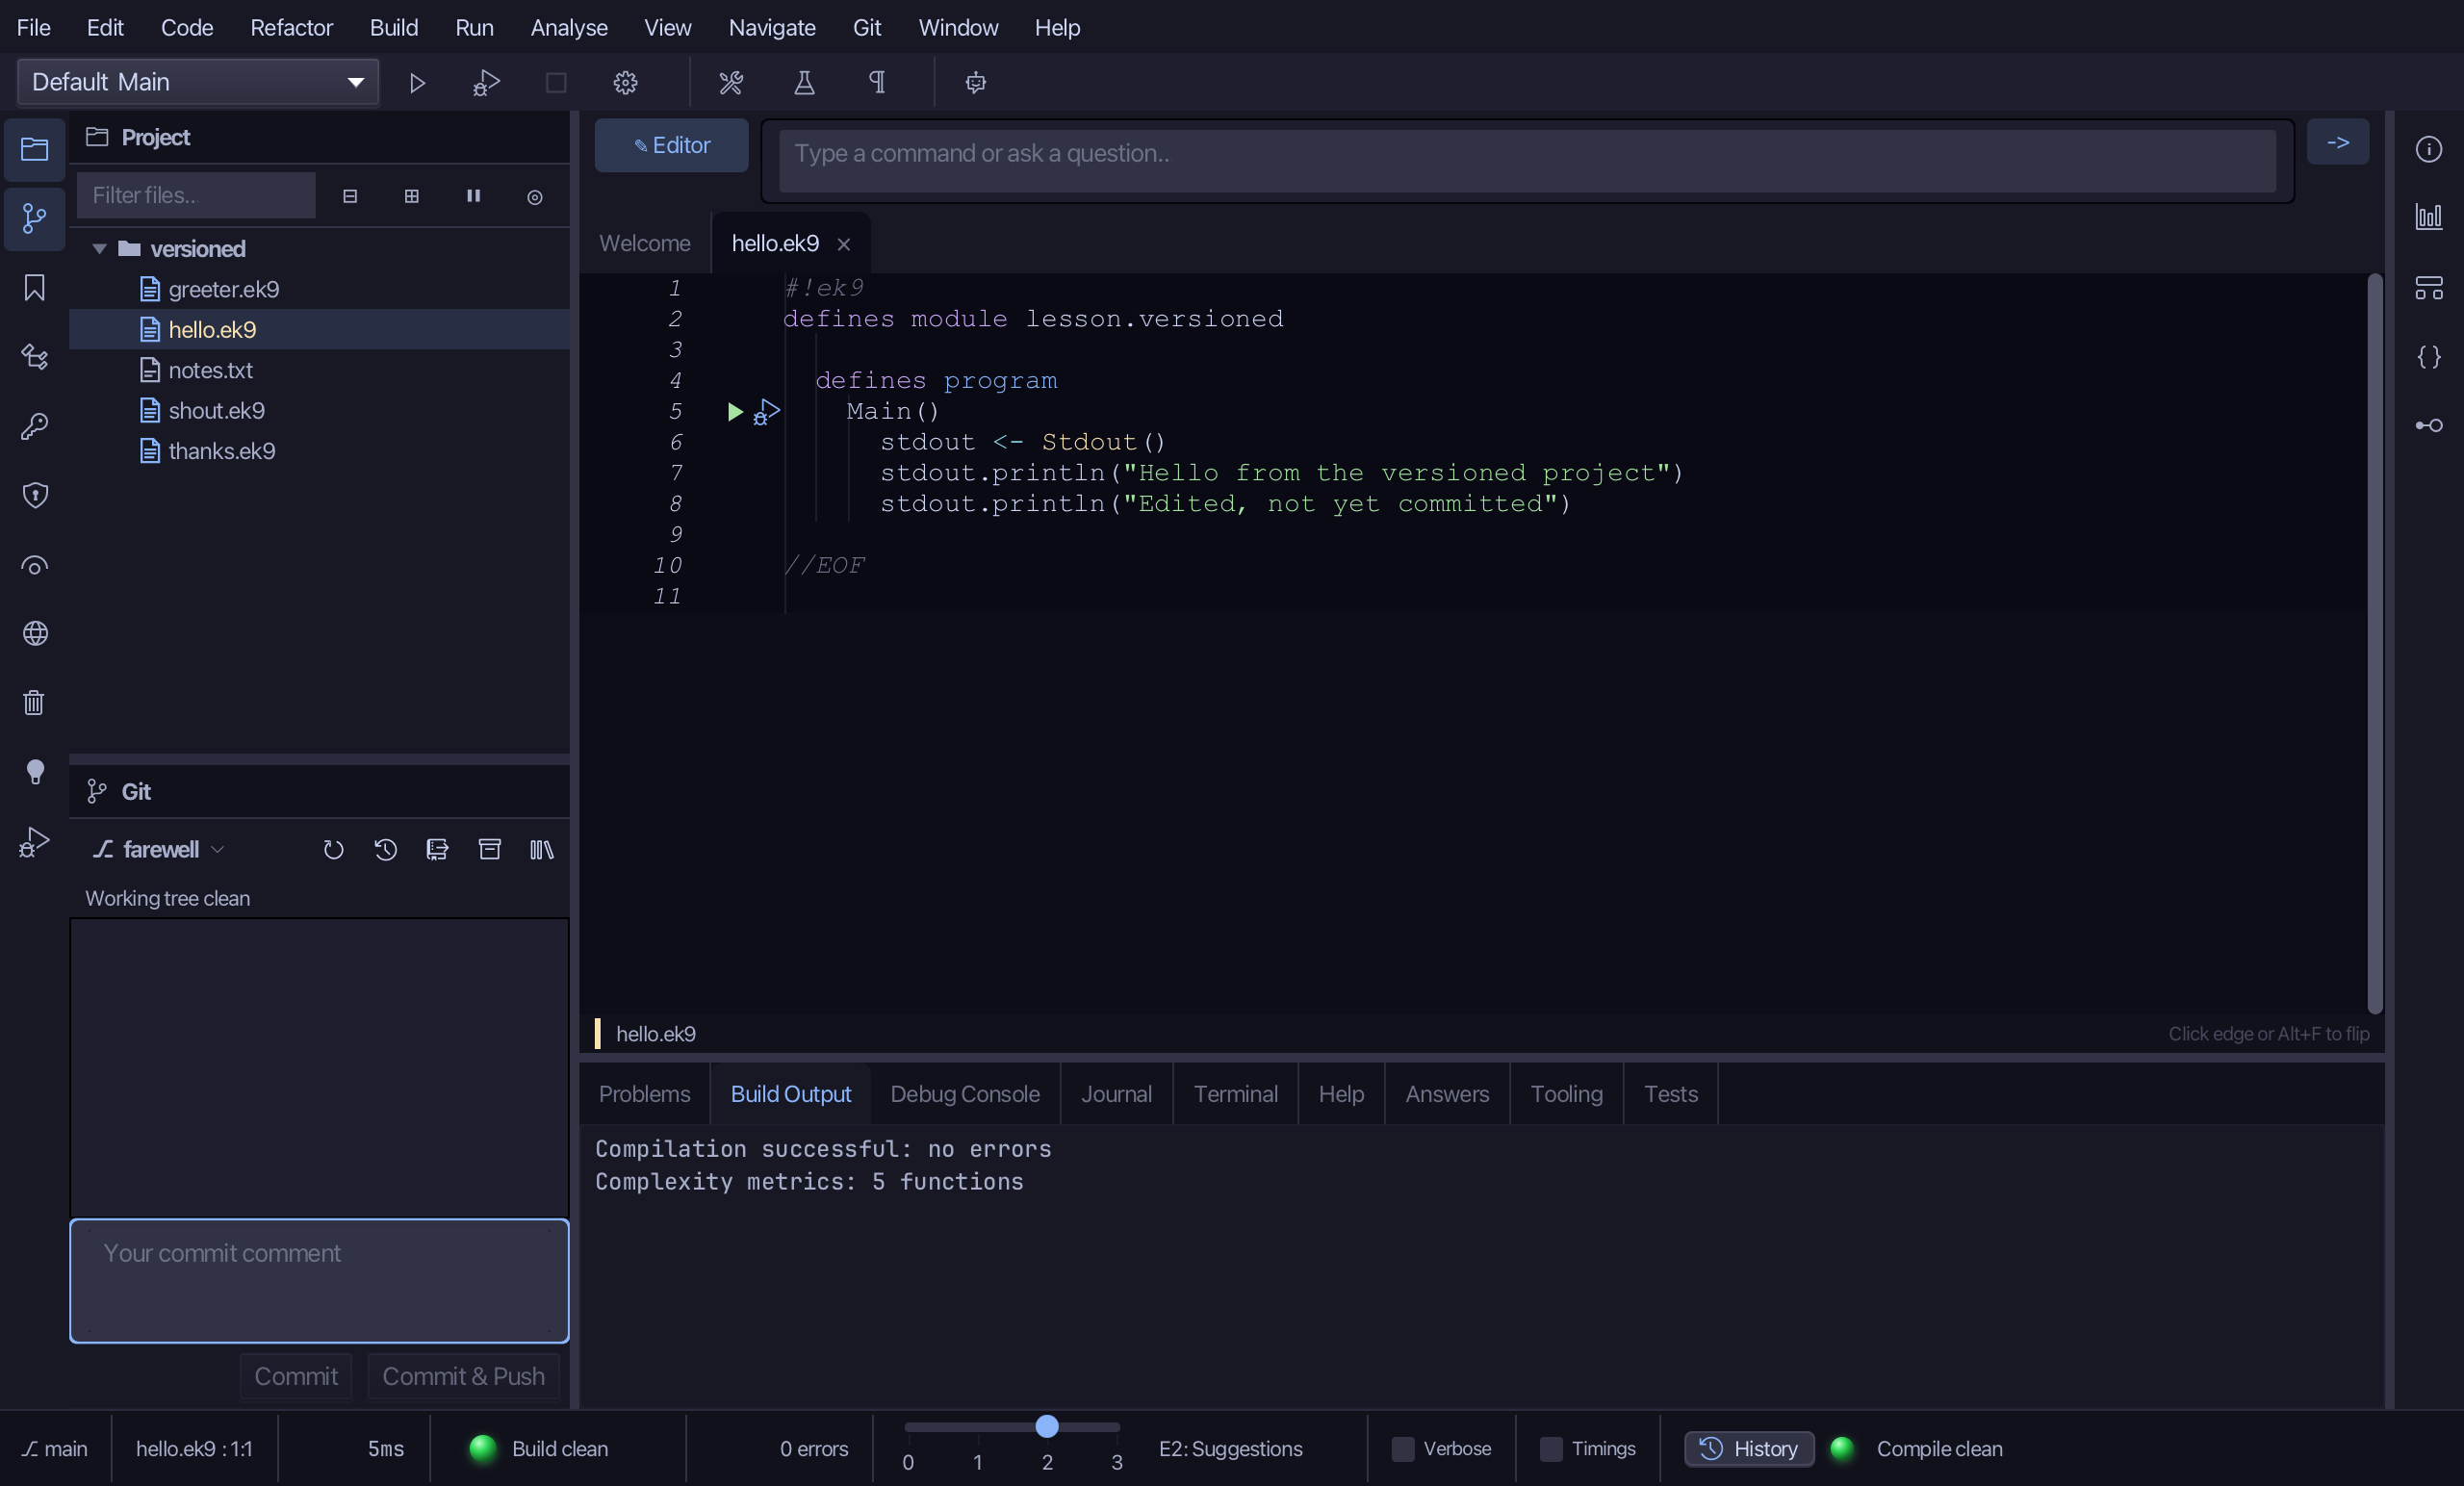
The result
That is the everyday loop. You staged the two files git did not have yet, committed all three with a message and pushed them - to a folder beside the project, this lesson's own remote - then Fetch and Pull brought in another person's thanks function, and Branches… started farewell from main. Commit & Push does Commit and Push together, Fetch looks without changing anything, and a right-click on a row also offers Diff and Discard…. AI assistants do the same with ek9_git_status, ek9_git_add, ek9_git_commit, ek9_git_push, ek9_git_pull and ek9_git_switch.
Where this lesson comes from
- For AI assistants - the MCP tool
ek9_git_status,ek9_git_add,ek9_git_commit,ek9_git_push,ek9_git_pull,ek9_git_branch,ek9_git_switch.